Tag: NextCloud

  • Wie ich Nextcloud nutze um ein papierloses Büro zu realisieren

    Wie ich Nextcloud nutze um ein papierloses Büro zu realisieren

    Eine meiner Hauptaufgaben besteht darin, Unternehmen und Selbstständige bei der digitalen Transformation Ihrer Betriebe zu beraten und Sie zu unterstützen. Dabei taucht immer die Frage auf, wie man ein “papierloses Büro” realisiert, was ein wesentlicher Bestandteil der digitalen Transformation bei Dienstleistungsunternehmen ist. In diesem Blog möchte ich kurz darauf eingehen, was man unter einem papierlosen Büro versteht und wie ich dieses für mich ungesetzt habe.

    Laut Wikipedia versteht man unter einem papierlosen Büro folgendes:

    Ein papierloses Büro verzichtet zwecks Arbeitseinsparung, Effizienzsteigerung und Umweltschutz u. a. auf papiergebundene Dokumente und nutzt dafür nur EDV-gestützte Verfahren.

    wikipedia.de

    Wie schaut dies nun in der Praxis aus?

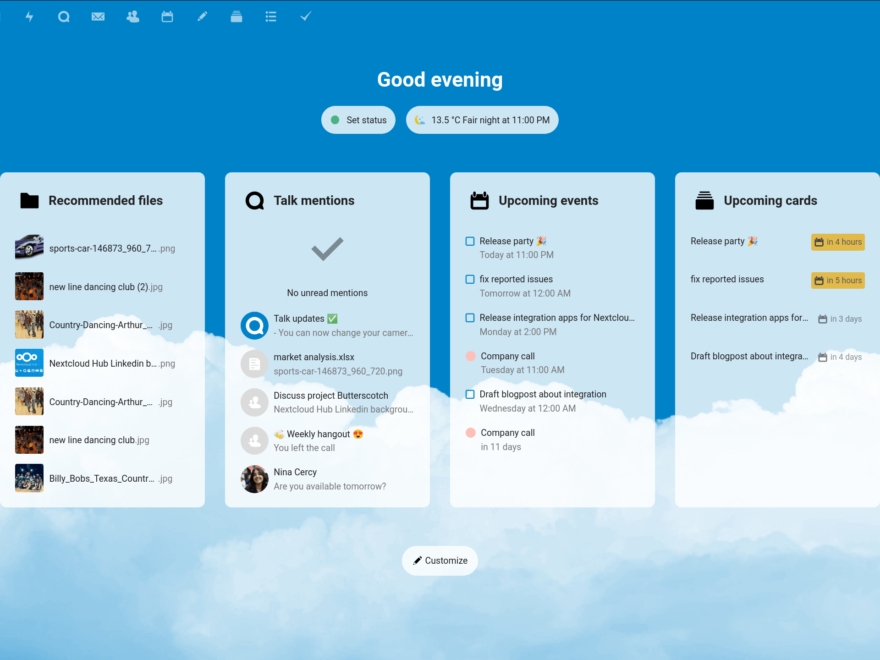
    Ich nutze innerhalb meiner Firma für die Verwaltung von Dokumenten, das Erstellen von Projektplänen, den Austausch von Daten mit Kollegen und Partnern, sowie der internen Kommunikation Nextcloud, ein webbasiertes Dokumentenmanagementsystem (DMS) welches um viele Funktionen (Apps) erweitert werden kann. Durch die Integration von verschiedenen Office-Lösungen ist ein rein webbasiertes Arbeiten mit Office-Dateien möglich, auch ohne lokale Officeinstallation.

    Durch diese Lösung sind alle Daten an einem zentralen Ort, Dokumente, Pläne, E-Mails oder Chatnachrichten sind jederzeit und überall abrufbar. Ich kann mit Kollegen und Partnern z.B. an einem Dokument, oder einer Präsentation arbeiten, oder über eine Datei diskutieren. Ich muss mir keine Gedanken über versehentlich gelöschte Dateien machen, da jede Änderung nachvollziehbar ist und rückgängig gemacht werden kann.

    Dank der Indexierung kann ich nach Begriffen suchen. Suche ich z.B. nach Herrn Müller werden wir alle Dateien, E-Mails, Chatnachrichten, Termine angezeigt, in denen er vorkommt. Dank einer integrierten Texterkennung funktioniert dies auch mit eingescannten Dokumenten.

    Auch unterwegs habe ich jederzeit vollen Zugriff auf alle Daten. Apps für Smartphones und Tablets ermöglichen den direkten Zugriff auf die Kamera, oder Mikrophone. So kann ich Vorort Fotos erstellen, oder Protokolle schreiben die sofort am Server gespeichert werden. Auch das Erstellen von Sprachnachrichten ist möglich. Zeitraubende Nacharbeiten, nach Rückkehr in das Büro, entfallen.

    Mit Talk verfügt Nextcloud über eine eigene Messenger Lösung, die eine DSGVO konforme Kommunikation innerhalb der Firma, aber auch mit Partnern ermöglicht. Talk wird dabei direkt am eigenen Server betrieben.

    Kurznotizen ersetzen bei mir im Büro die Post-Its und dank der Integration von OpenProject, welches ich für das Projektmanagement nutze gibt es auch hier eine Symbiose.

    Aus meiner Sicht erleichtert Nextcloud den gesamten Büroalltag, wobei für mich das integrierte Office, die Kurznotizen sowie die Erweiterbarkeit durch Apps die Highlights dieser Lösung gegenüber anderen sind.

    Sollte dieser Artikel Ihr Interesse geweckt haben, oder möchten Sie Ihre Erfahrungen zum papierlosen Büro kundtun, dann kontaktieren Sie mich, oder hinterlassen Sie einen Kommentar. Ich freue mich.
  • NGINX Main process exited, code=killed, status=11/SEGV on Ubuntu 20.04.x LTS

    During setting up a virtual host with Ubutnu 20.04.5 LTS for a customer for Nextcloud, Only Office and Zammad I came across the following problem:

    After installing nginx-extras (nginx-extras is required by only office) with PHP-8.1. on Ubtuntu 20.04.5 LTS the nginx server always crashed after a certain time, without any comprehensible reason. After a more detailed analysis I found out that the main process exited more or less exactly after 24 hours (sometimes 48 hours) after systemd reloaded nginx:

    systemd[1]: Reloading A high performance web server and a reverse proxy server.
    systemd[1]: Reloaded A high performance web server and a reverse proxy server.
    systemd[1]: nginx.service: Main process exited, code=killed, status=11/SEGV 
    systemd[1]: nginx.service: Killing process 462641 (nginx) with signal SIGKILL.
    systemd[1]: nginx.service: Killing process 462641 (nginx) with signal SIGKILL.
    systemd[1]: nginx.service: Failed with result 'signal'.
    
    nginx.service - A high performance web server and a reverse proxy server
         Loaded: loaded (/lib/systemd/system/nginx.service; enabled; vendor preset: enabled)
         Active: failed (Result: signal) since Mon 2022-09-12 02:24:57 CEST; 6h ago
           Docs: man:nginx(8)
        Process: 700608 ExecStartPre=/usr/sbin/nginx -t -q -g daemon on; master_process on; (code=exited, status=0/SUCCESS)
        Process: 700609 ExecStart=/usr/sbin/nginx -g daemon on; master_process on; (code=exited, status=0/SUCCESS)
        Process: 815231 ExecReload=/usr/sbin/nginx -g daemon on; master_process on; -s reload (code=exited, status=0/SUCCESS)
       Main PID: 700610 (code=killed, signal=SEGV)
          Tasks: 0 (limit: 1843)
         Memory: 8.2M
         CGroup: /system.slice/nginx.service

    After some research I found out that when installing nginx-extras the perl module who allows to execute perl scripts directly in nginx is also installed. However there is a bug in perl shipped with Ubuntu 20.04.x LTS which results in a nginx crash after nginx is reloaded after three or four times.

    To solve this bug I decided to unlink the mod-http-perl module and restart nginx using the following command:

    unlink /etc/nginx/modules-enabled/50-mod-http-perl.conf
    sudo systemctl restart nginx

    Since that nginx is running completely fine. I do not need to execute perl directly in nginx, therefore there are no side effects I have to consider.

    Links:

  • True-NAS jail: Update NextCloud using command line

    In my opinion the best way to update NextCloud is using the command line, with the web installer I had some problems, especially if the internet connection is not really fast. Therefore I always use the command line to update NextCloud.

    In this blog entry I will give a short tutorial how to update NextCloud to the latest version, using the command line of the jail. For this tutorial I will use the Shell of the TrueNAS web interface.

    As first step I would suggest that you update your jail to the latest version. This is quite simple, you can directly do this in the web interface of TrueNAS. Login, go to “Jails” -> select the NextCloud jail -> Press the “>” icon in the right and select “Update”. A dialog will open where you need to confirm, and then the update is executed.

    After this, select the shell of the jail.

    To remember the default NextCloud jail of TrueNas is using the following installation/configuration settings/paths:

    • Webserver: NGINX
    • PHP: php-fpm
    • Path to NextCloud: /usr/local/www/nextcloud
    • User who is running nginx and PHP: www

    With this information we will simply call the command line updater of NextCloud using the following command:

    sudo -u www php /usr/local/www/nextcloud/updater/updater.phar

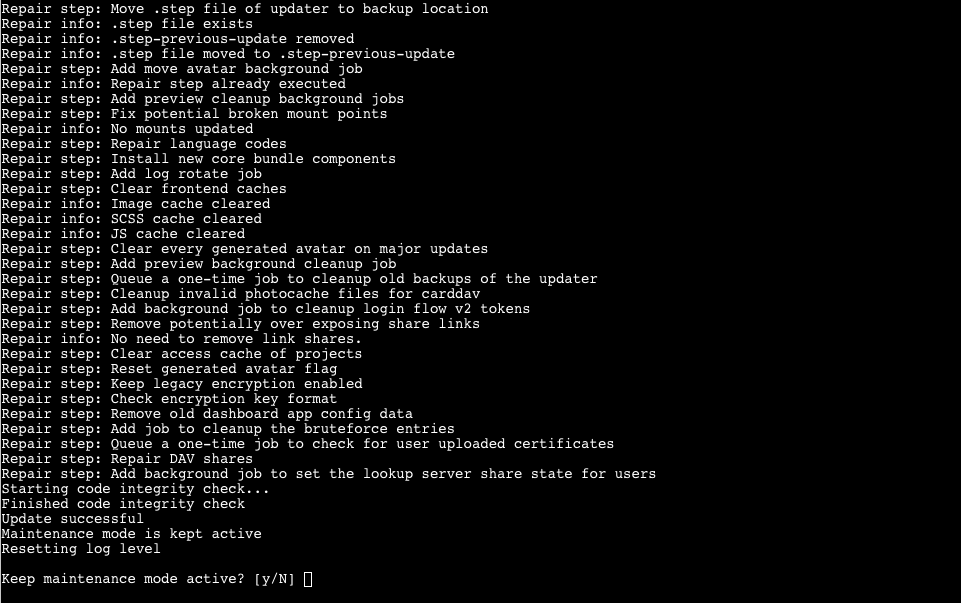
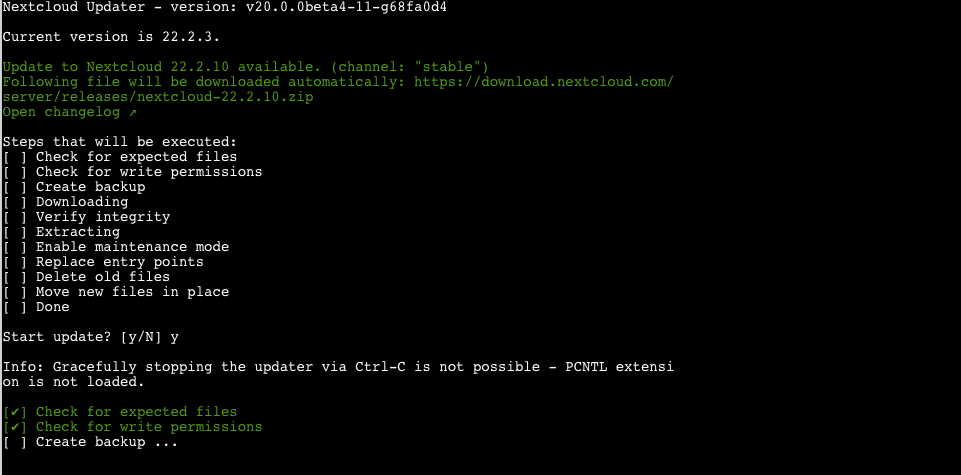
    If the command is working and no error is thrown you should get the following output (I already pressed Y that I want to update NextCloud):

    If you have a problem with the information that stopping the update using Ctrl-C is not possible, you can install the PCNTL extension using snap.

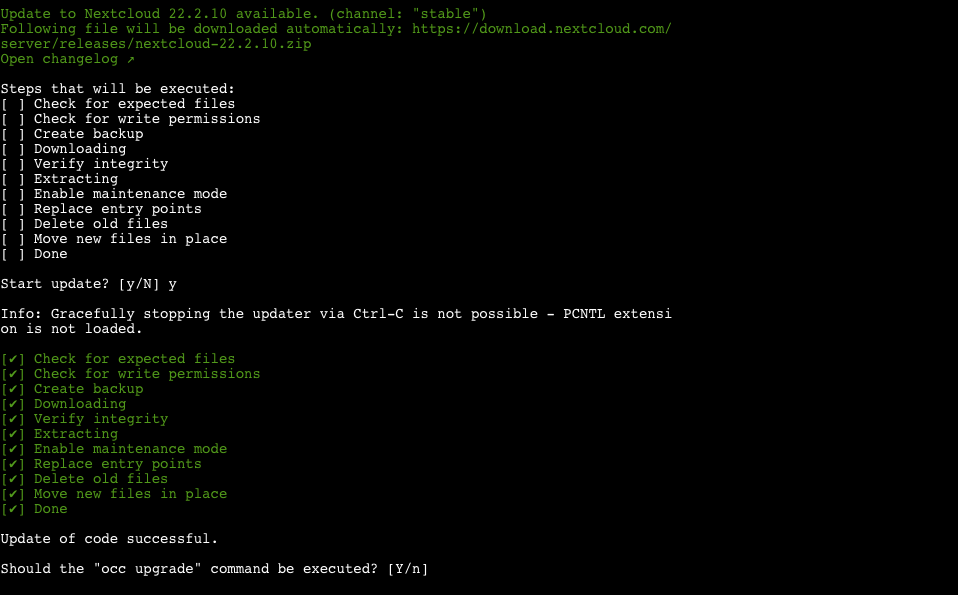
    The Updater is now creating a backup, then its downloading the latest NextCloud release, after that it checks the integrity and certain other things. Dependent on the internet connection and the performance of your TrueNAS instance this can take a while.

    When the update is successfully the systems asks the user if the occ upgrade command should be executed. This is necessary to finish the update. During this step changes in the database and the file data structure of NextCloud are executed and new versions of the plugins are installed.

    Press “Y” to execute the occ upgrade. After a while everything should be finished and NextCloud asks you if the maintenance mode should stay active. Enter “N” and NextCloud should again be online.

    The update is only executed from the running version to the next one and not to the latest! If there are several versions in between it can be necessary to execute the update command more than one time.

  • TrueNAS/FreeBSD NextCloud jail enable HEIC support

    Next Cloud uses ImageMagick to create, display and manipulate images in the web frontend. Unfortunately the NextCloud Plugin has been created without ImageMagick support for HEIC. Therefore we need to make our own ImageMagick package with enabled HEIC support and replace it by the original one. This can be done using ports:

    The FreeBSD Ports and Packages Collection offers a simple way for users and administrators to install applications. Instead to the pkg approach, with Ports no precompiled and configured packages are downloaded and installed on your FreeBSD system. You download the source code and create your own package based on your needs.

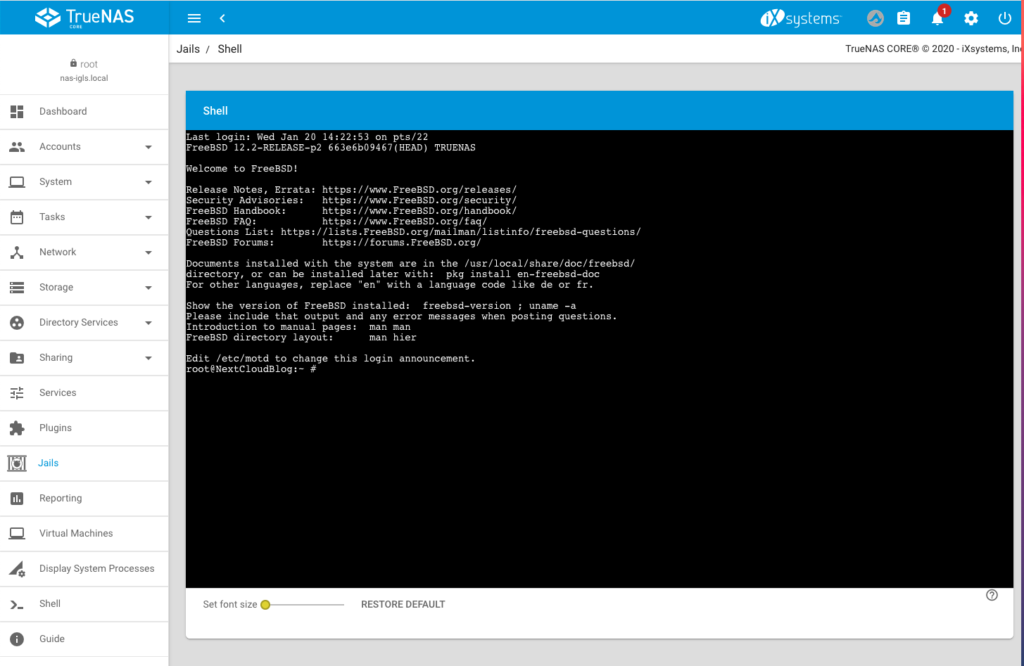
    To start, login to the console of your NextCloud jail:

    Step 1: Install required PKG packages:

    When I tried to make my own package in my jail I got several errors because required dependencies needed by make where not installed or could not successfully compiled. Instead of searching for the reason I decided to go the easy way and installed some dependencies, using PKG:

    pkg install dialog4ports
    pkg install gobject-introspection
    pkg install gdk-pixbuf2
    pkg install libheif

    Step 2: Download ports and build your own ImageMagick package:

    Fetch a snapshot of Ports:

    portsnap fetch

    Extract the snap

    portsnap extract

    Go into the ImageMagick ports source folder:

    cd /usr/ports/graphics/ImageMagick7-nox11

    Configure the new package:

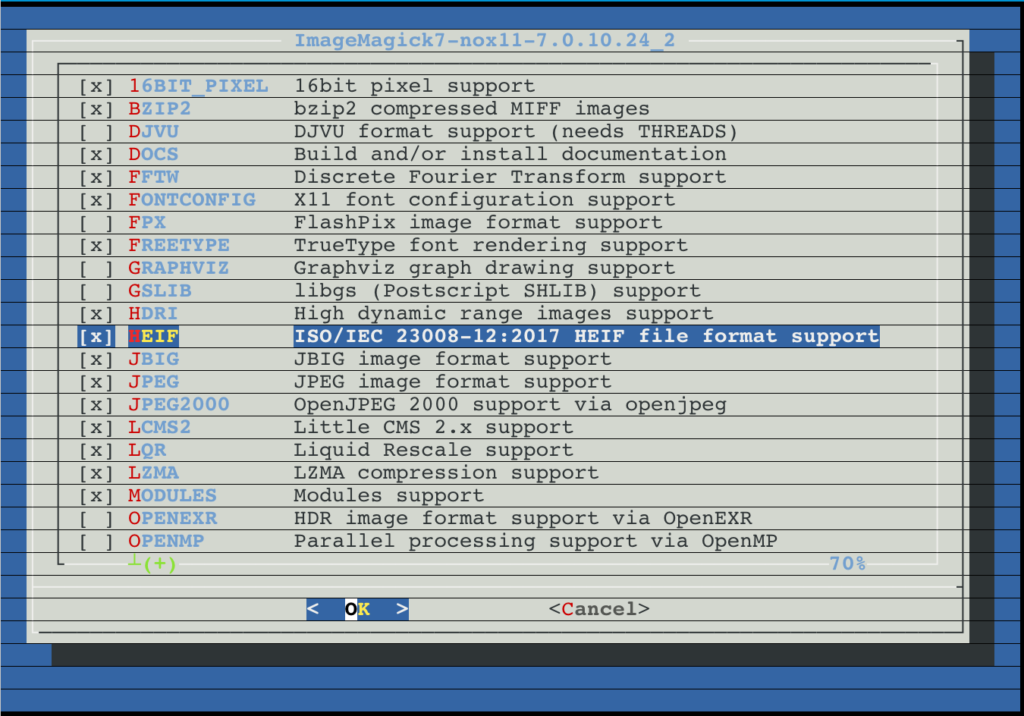
    make config

    Enable HEIF (this is the same as HEIC) in the window (and other image formats you want that ImageMagick should support):

    Press OK/Enter to confirm.

    Make&build the package:

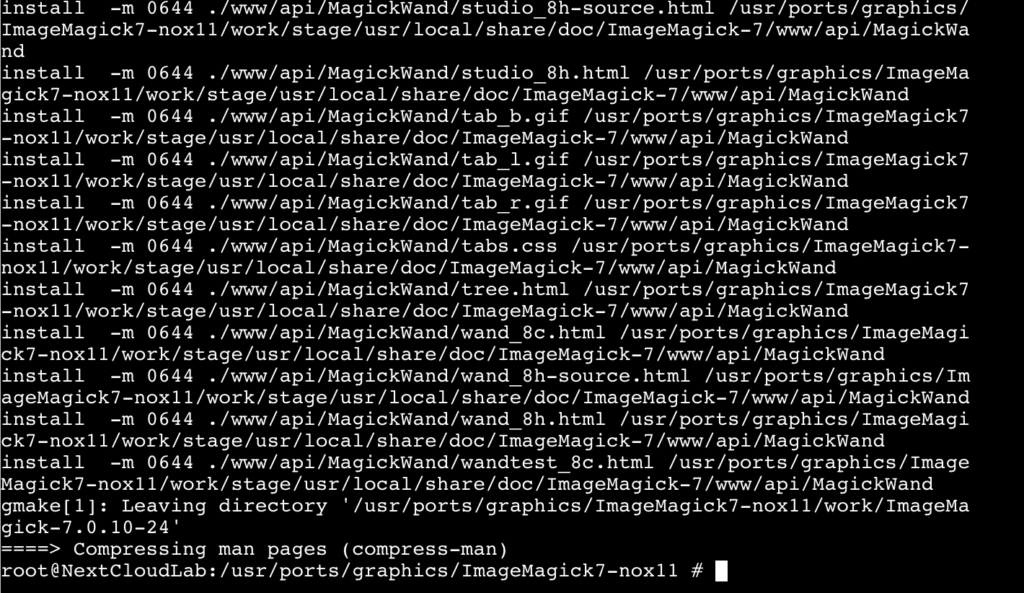
    make -DBATCH -DALLOW_UNSUPPORTED_SYSTEM

    I need to add the -DALLOW_UNSUPPORTED_SYSTEM flag because I have an older jail version which is no longer natively supported by Ports. I you have a newer jail version you can skip this flag. Now the system ist building/compiling the ImageMagick package. Dependent on your system resources, this can take a while.

    If make could successfully finished (like the above image), enter the following command to replace the current ImageMagick Version by our compiled one:

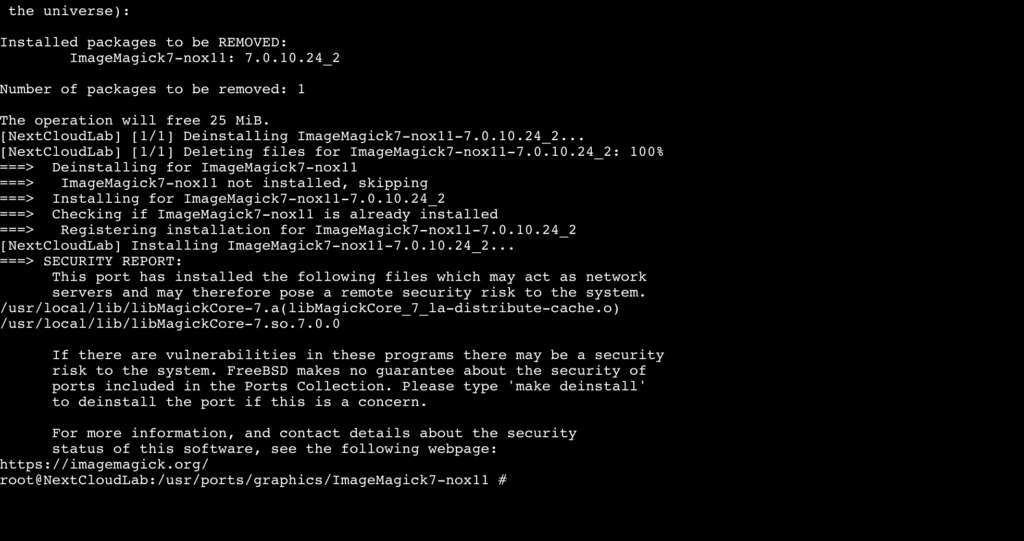
    make deinstall reinstall

    Now lock the ImageMagick package:

    pkg lock ImageMagick7-nox11

    Confirm the lock by pressing y

    Autoremove all leftovers of the original ImageMagick package:

    pkg autoremove

    Again confirm with y

    Check if HEIC/HEIF is now enabled by using the following command:

    convert -list format | grep HEIC

    You should get the following return:

    Congratulations, you have successfully compiled your own ImageMagick package with enabled HEIC/HEIF. After a short time you should be able to see thumbnails of HEIC/HEIF images in your NextCloud instance.

    Optional: Release the lock:

    pkg unlock ImageMagick7-nox11

    Warning: if you update your jail with an unlocked ImageMagick it is possible that the changes will be overwritten.

    This tutorial bases on the following discussion in the TrueNAS Forum:

  • Securing NextCloud jail using https and let’s encrypt (part two)

    In part one of this tutorial we installed TrueNAS and created a NextCloud jail which makes the NAS content available using a web browser or the NextCloud app locally. In part two we will secure our NextCloud instance using https and make it reachable from the Internet.

    To do this we need the following requirements:

    1. A domain name which can be resolved from the Internet: Select oder register a domain name and make a DNS record pointing to the public IP-Address of your internet connection. I you have a dynamic IP-Address, you can use Dynamic DNS providers like NoIP to register a domain name.
    2. NAT and/or Port Forwarding for 80 and 443 on your Firewall and/or Router to the NextCloud IP-address: Configure your firewall for NAT or Port Forwarding that your TrueNAS server is reachable from outside using port 80 and 443.
      Because there is a huge variety of devices I cannot not go into detail. If you are unsure check the documentation of your Modem/Router/Firewall for NAT and Port Forwarding.

    After we have prepared the requirements we will start securing our NextCloud instance with Let’s Encrypt. To do this, login to the backend of your TrueNAs server select the NextCloud jail and enter the command line:

    Step 1 – Add the server name to the nginx config

    We need to set the server name that certbot can verify it. To do this enter the following command to switch into the config folder of nginx:

    cd /usr/local/etc/nginx/conf.d/

    Use vim to open the config file:

    vim nextcloud.conf

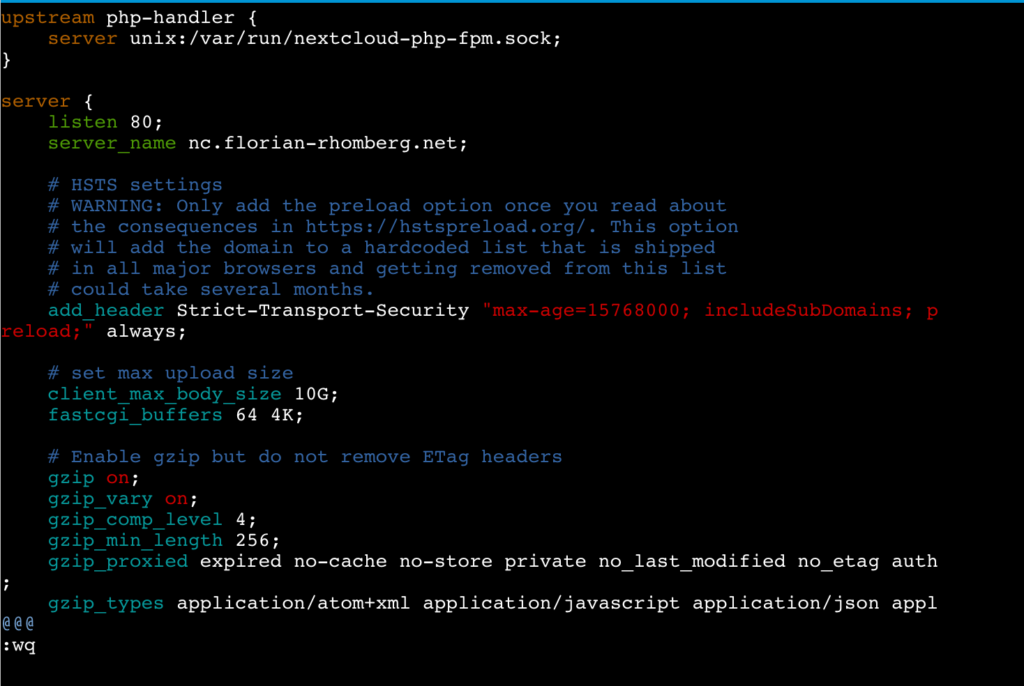
    Replace the _ by the server name as displayed in the following screenshot:

    Save the changes and exit vim.

    Step 2 – Installing Certbot

    The following lines are more or less a copy of the real good tutorial from digitalocean.com describing How To Secure Nginx with Let’s Encrypt on FreeBSD. If have adjusted some commands (in the jail we do not need to use sudo) and skipped the part “Setting Up a Firewall and Allowing HTTPS Access” because we do not need to do this in the jail.

    The certbot client is needed to obtain an SSL certificate. To do this we will use FreeBSD’s ports system. Enter the following commands in the command line of the jail:

    Fetch a snapshot of the ports tree:

    portsnap fetch

    Extract the snapshot:

    portsnap extract

    Navigate to the py-certbot directory:

    cd /usr/ports/security/py-certbot

    Use the “make” command to download and compile the Certboot source:

    make install clean

    If you get the following error message (happened to me on TrueNas Core 13):

    /!\ ERROR: /!\
    
    Ports Collection support for your FreeBSD version has ended, and no ports are
    guaranteed to build on this system. Please upgrade to a supported release.
    
    No support will be provided if you silence this message by defining
    ALLOW_UNSUPPORTED_SYSTEM.

    you have to make the following command first:

    setenv ALLOW_UNSUPPORTED_SYSTEM YES

    The reason for this ist, that the jail of the Plugin uses an older version, which is no more supported by portsnap.

    During this installation it is possible that some dialogs appear, you can safely confirm them.

    Navigate to the py-certbot-nginx directory:

    cd /usr/ports/security/py-certbot-nginx

    There run the make command to install the certbot plugin for nginx:

    make install clean

    After a certain time the certbot Let’s Encrypt client is ready to use

    Step 3 – Obtaining a SSL Certificate

    Remember the requirements I have mentioned before. If they are fullfilled we can now obtain and validate a certificate by using the following command:

    certbot --nginx -d nc.florian-rhomberg.net

    Replace the domain nc.florian-rhomberg.net by your domain name.

    Enter an E-Mail address and press enter:

    Accept the terms of service by pressing y:

    Accept or not that your E-Mail address will be shared with the EFF:

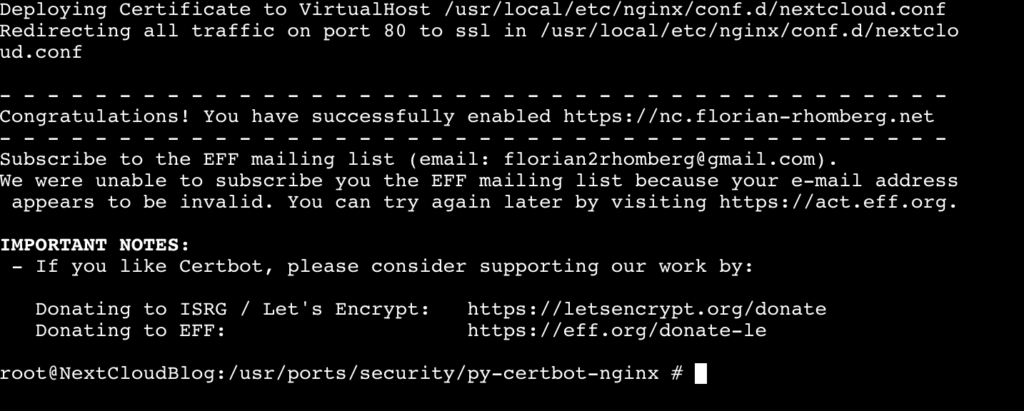
    In the next stepped your are asked if HTTP should redirected to HTTPS, I would suggest to do this. I everything is working the SSL certificate is installed and you will get the following message:

    Congratulation your NextCloud instance is now available from the Internet using HTTPS.

    Step 4 – Verifying Certbot Auto-Renewal

    In the last step we ensure that the Auto-Renewal of the SSL certificate is working.

    First make a simulation of the renewal process manually by using the following command:

    certbot renew --dry-run

    If this command succeed we can define a cron job for Auto-Renewal. For this enter the following command:

    crontab -e

    Now you can define the cron job for renewal:

    0 0,12 * * * /usr/local/bin/certbot renew

    This line will tell cron to run the certbot renew command twice every day. It checkss if there is any certificate on the system which is close to expire and will attempt to renew them when necessary.

    Congratulation, now your NextCloud instance is reachable from the Internet and is using HTTPS per default.

    Any kind of feedback is highly appreciated.

  • Creating a private cloud using TrueNAS Core and NextCloud (part one)

    Last summer I decided to replace my QNAP NAS by a more comprehensive NAS. I am working a lot with Dell servers, and therefore it was an easy decision for me to use a Dell PowerEdge R340 with currently two 10 TB Seagate Iron Wolf hard discs, and two 16GB microSDHC/SDXC Cards as replacement. I know using such a server as a private NAS might be exaggerated, for some, but I wanted a rack device and more important enough server resources for experimental reasons. As operating system I decided to use TrueNAS Core, formerly FreeNAS.

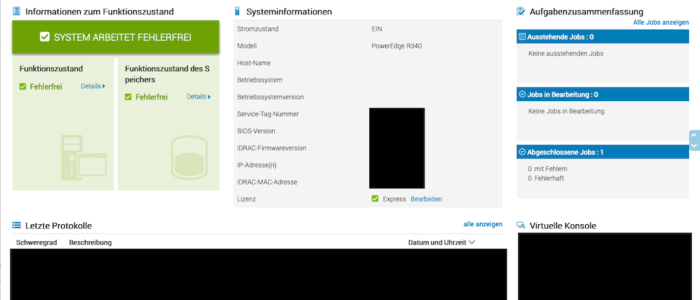
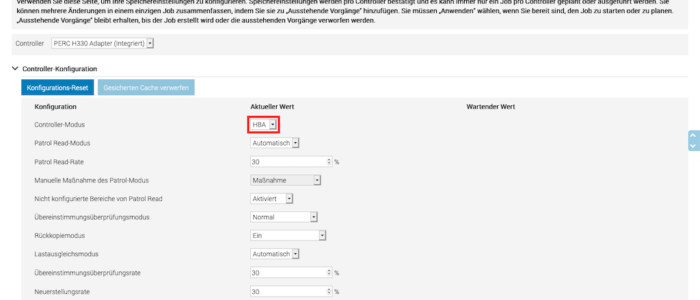
    I configured the PERC Raid Controller in HBA mode using iDRAC, because TrueNas is using ZFS which has an integrated RAID functionality. In fact, using a Hardware RAID with TrueNAS is definitely not suggested! The two screenshots below show, how to switch to HBA mode using iDRAC:

    I installed TrueNAS on one of the two 16GB microSDHC/SDXC Cards. The two 10TB Seagate discs should exclusively be used as storage devices and not partly for the operating system. The second 16GB microSDHC/SDXC Card will later be used to mirror the operating system.

    I performed the installation using the web interface of iDRAC, which is really a comfortable way to do it. iDRAC is an independent administration tool, shipped with all Dell servers and works immediately after the server is plugged in to the power supply. From iDRAC you can control and administrate the complete server. There is also a remote console feature.

    There are a lot of tutorials available in the web how to install TrueNAS therefore I do not want to go into detail and refer to them.

    After installing TrueNAS Core, creating one or more pools and sharing we have a working NAS which we can access, using SMB, AFP etc. Again, I do not want to go into detail and reference to the TrueNAS documentation because scope of this blog is how to create a private cloud using NextCloud and how to access it from anywhere in the world.

    Installing NextCloud

    Now let us start with the installation of NextCloud. TrueNAS provides a certain number of plugins to extends the functionality of the NAS. Each plugin will be installed in his own jail and is therefore independently. Wikipedia defines a jail as a “OS-level virtualization that allows system administrators to partition a FreeBSD-derived computer system into several independent mini-systems called jails, all sharing the same kernel, with very little overhead”. Simply spoken, it’s a FreeBSD container virtualization like Docker. Some plugins are officially maintainanced by iXsystems and there are also a certain number of community plugins available.

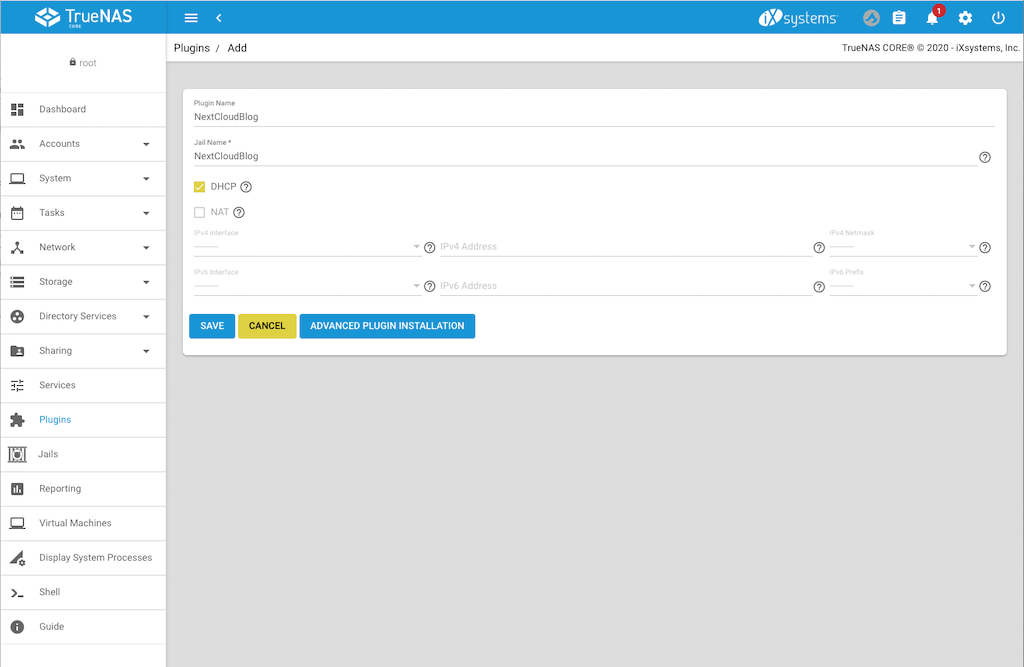
    NextCloud is an official plugin, therefore we simply goes to Plugin int the TrueNAS backend and select NextCloud. At the time when this entry was written the plugin is using NextCloud 20.0.4, instead of 20.0.5. However this is nearly the current version and shows me, that the plugin is actively maintenanced by iXsystem. Select the plugin and press install. A form is opened where you can define the settings. Enter the plugin name and jail name you want. Disable NAT, we will give this jail its own IP-Address. Select the interface on which the NAS ic connected, enter the IP-Addres you want that next cloud is listening and the netmask. Alternatively press DHCP if you want to manage the IP-Address in your router, as I mostly do. The following screenshot shows the settings:

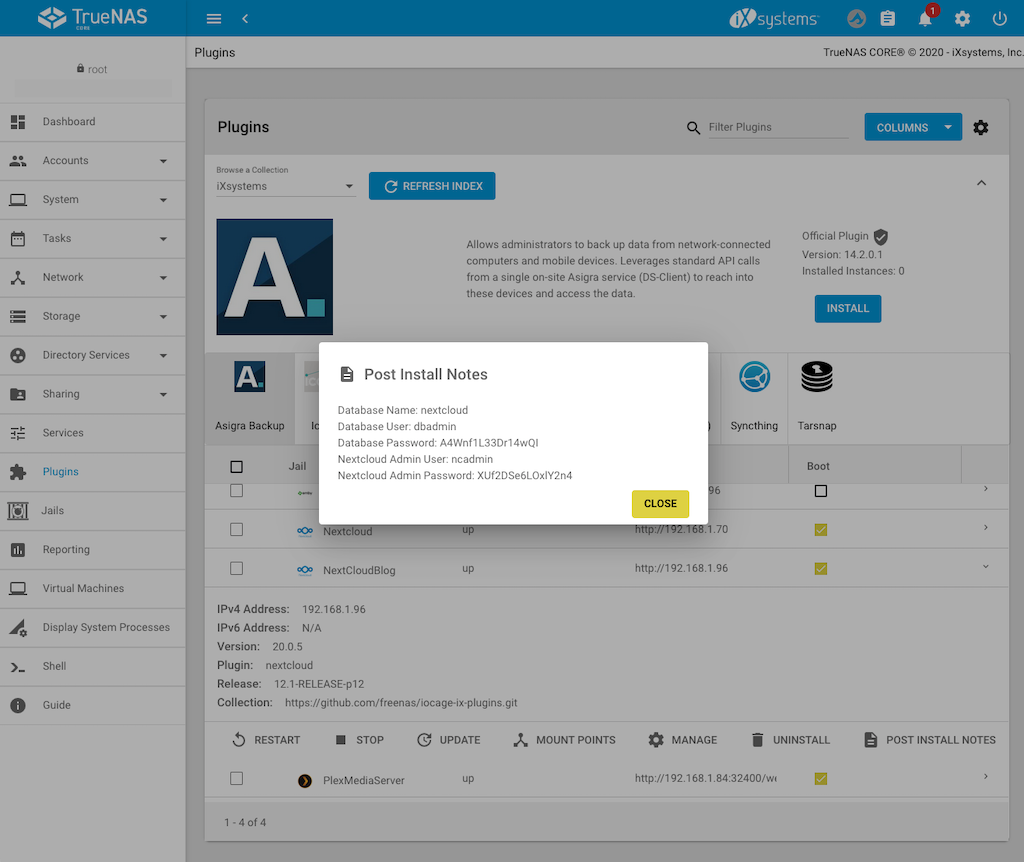
    Press save and installation dialog is displayed and wait until it is finished. Press “Close” to close the dialog which informs you about the successfully installation. Next press “Post Install Notes” to display the username and password for the admin access to NextCloud and copy it or write it down:

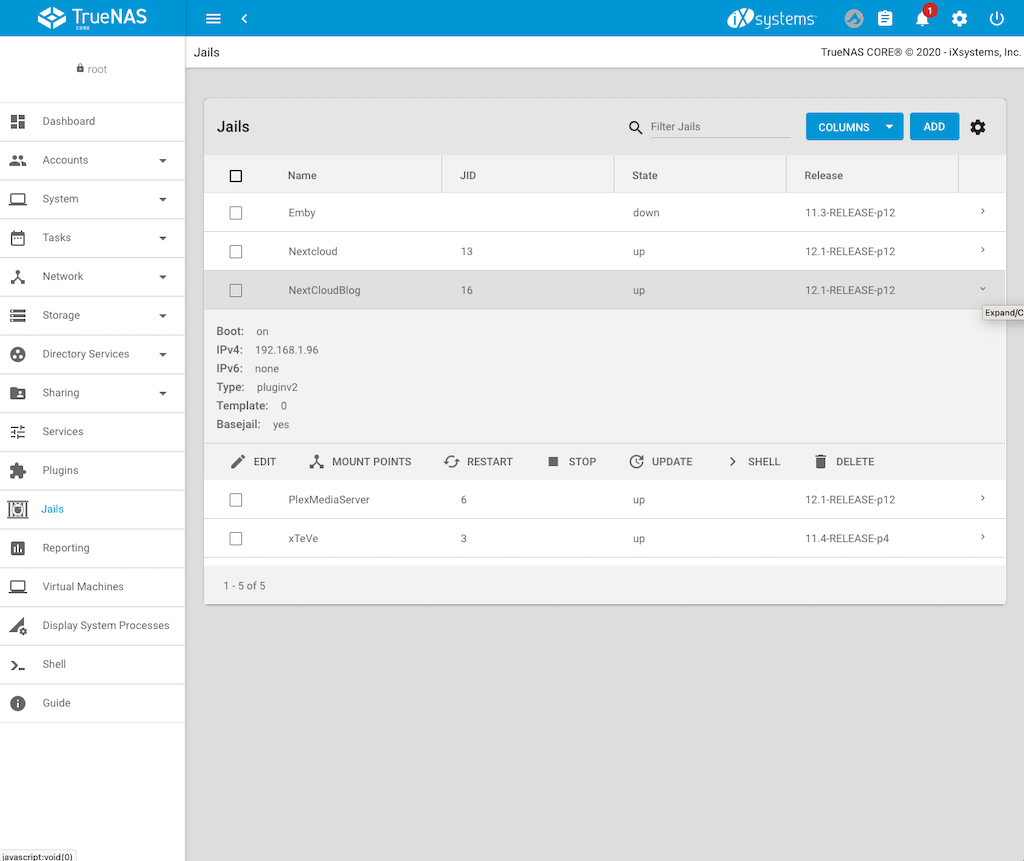
    Now switch to Jails to get the IP-Address of your NextCloud jail and to create mount points:

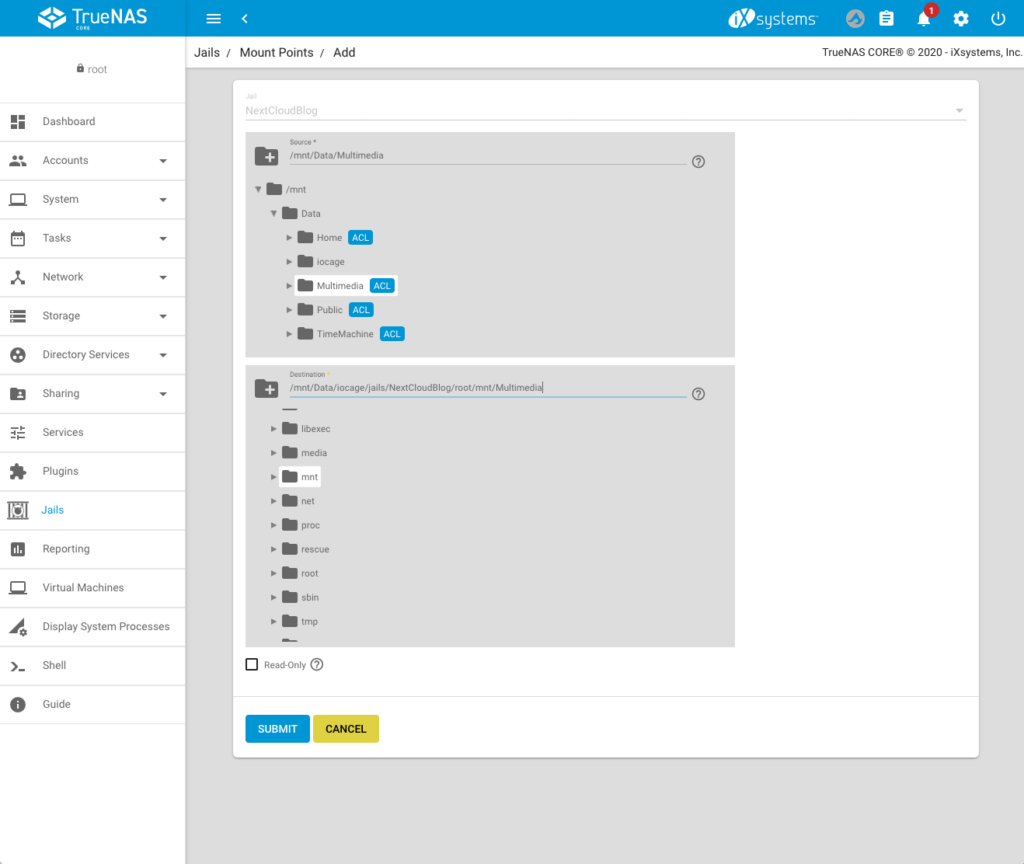
    Creating the mount points for the jail

    Before we access our NextCloud instance for the first time, we will mount the NAS directories which should be accessible from the jail and therefore from NextCloud. To do this:

    1. Stop the jail
    2. After the jail has stopped press “Mount Points”
    3. Press on “Actions” and select “Add”
    4. On the top, select the directory which should be accessable from the jail (in my case /mnt/Data/Multimedia)
    5. Below select the mounting point in the jail (in my case: /mnt/Data/iocage/jails/NextCloudBlog/root/mnt/Multimedia). You do not have to create the folder in the jail first, you can directly enter the path (the folder Multimedia does not exist in the jail, but it will now be created).

    6. Press “Submit”. You can add additional Mount Points if you want.
    7. Go back to jails and start the jail.

    Add the local network to the trusted domains of NextCloud

    Unfortunately before we can use the NextCloud webinterface we need to add the local network to the trusted domains. To do this:

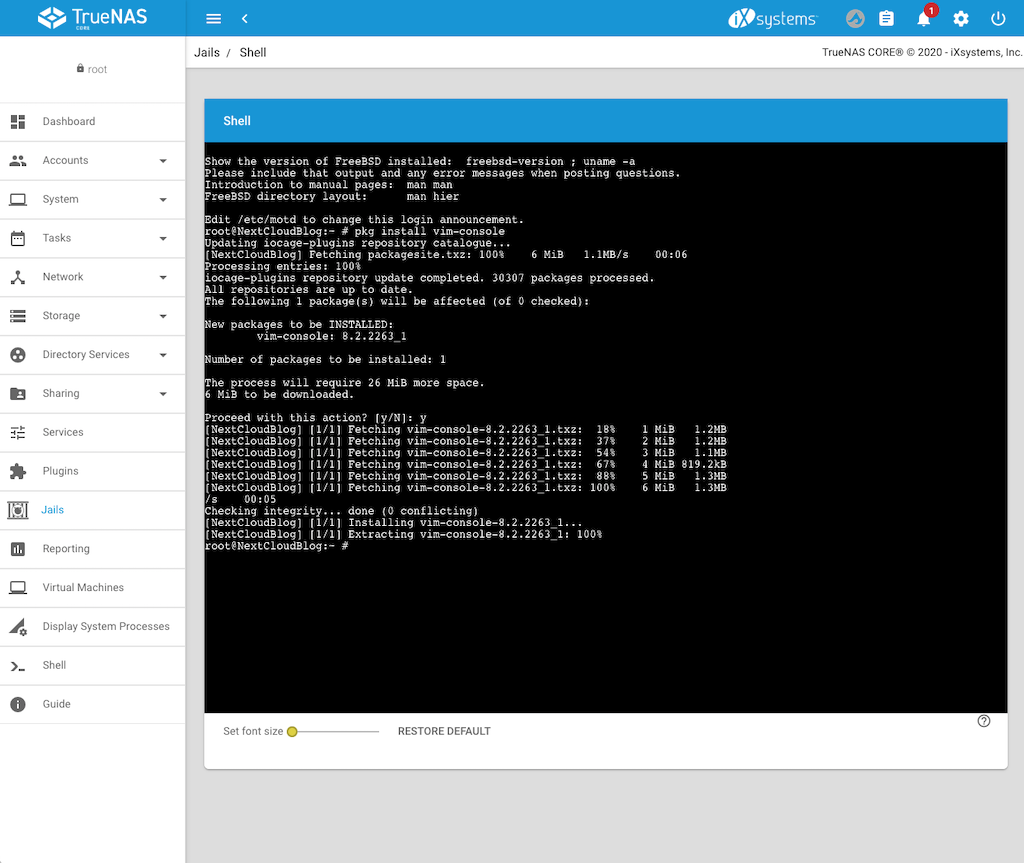
    1. Select the NextCloud jail and press the “Shell button”
    2. Install the vim editor to directly edit the config.php file by using the following command:
      pkg install vim-console
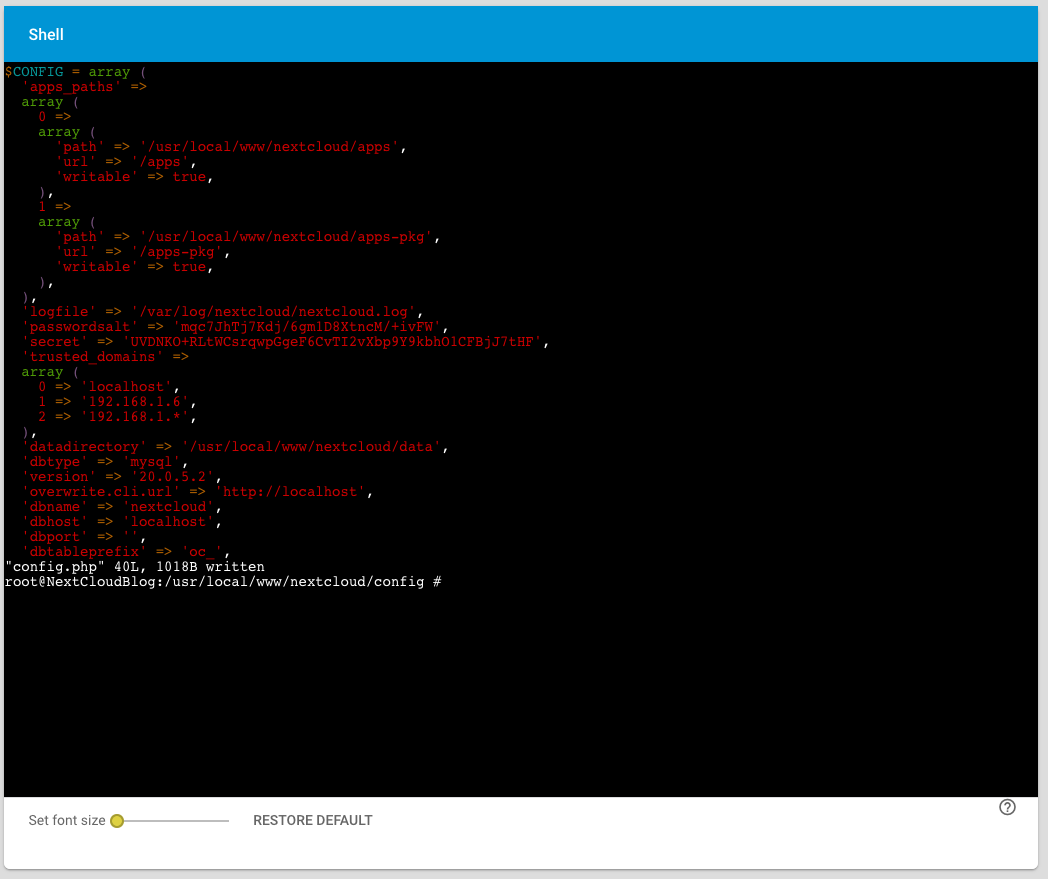
    3. Go to the config file by the entering the following command:
      cd /usr/local/www/nextcloud/config
    4. Open config.php file to edit:
      vim config.php
    5. Press i to insert and edit the lines
    6. Add the whole home network by adding the following line to the trusted domains:
      2 => '192.168.1.*'
      or whatever your home network IP-Address is.
    7. Press Esc and then enter :wq to store the file and exit vim.

    Accessing NextCloud for the first time

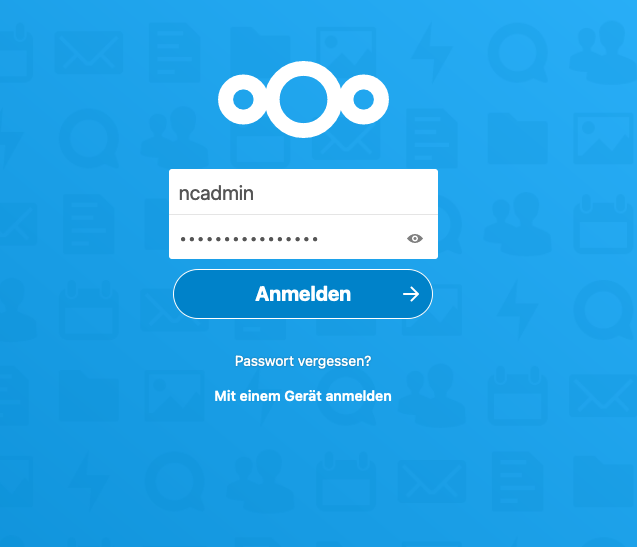
    No we can login to NextCloud for the first time by entering the IP-Address of the Jail:

    I would suggest to change the password of ncadmin or simply create a new admin user. In the next step we will add the Multimedia mounting point to NextCloud.

    Enable External storage to add a local directory to NextCloud

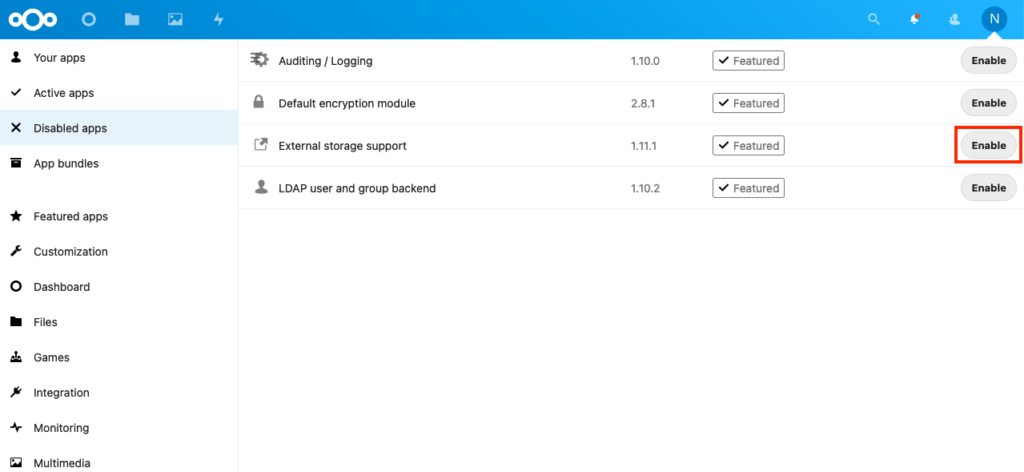
    In the NextCloud backend we switch to apps and then to “Disabled apps”. There we find the “External Storage support” app and enable it:

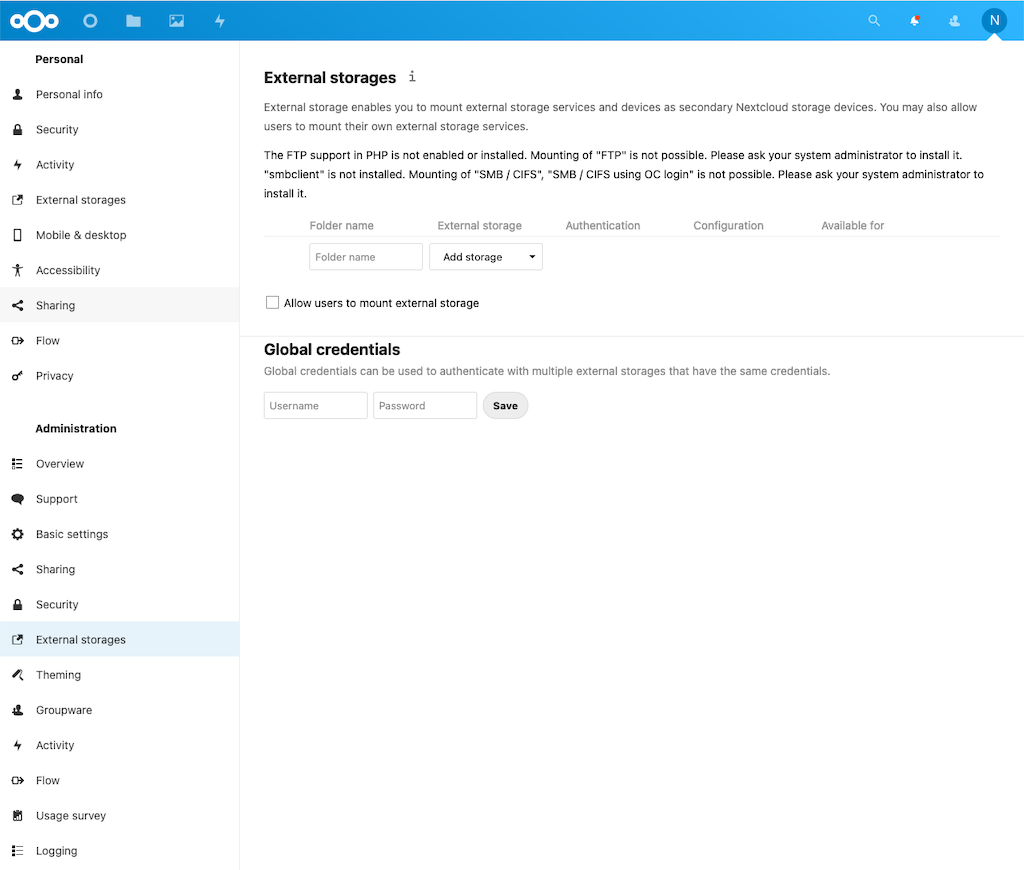
    In the next step we switch to settings and select “External Storages”

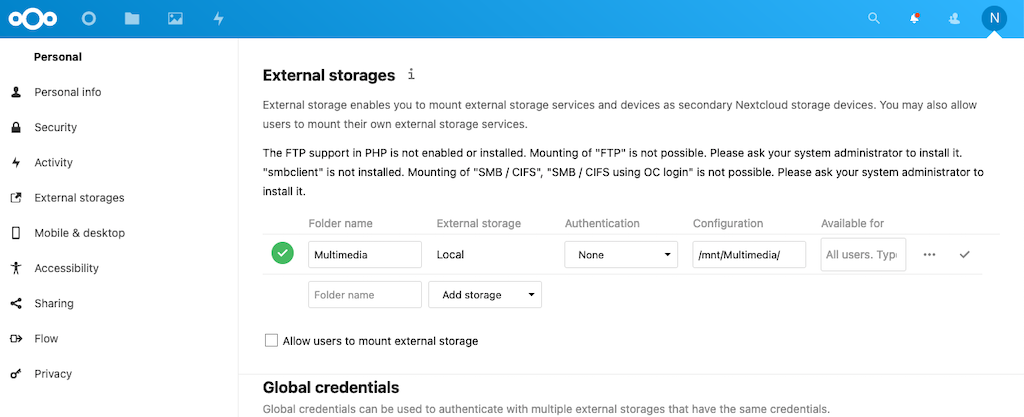
    Now we can enter the “Folder Name”, the type of “External storage” (Local), the “Authentication”, the “Configuration” (meaning mounting point, or location) and who is allowed to access our external storages (“Available for”). Final press the Checkmark to check and store the configuration. Based on this tutorial the external storage configuration looks the following way, the green checkmark confirms that the external storage is accessable:

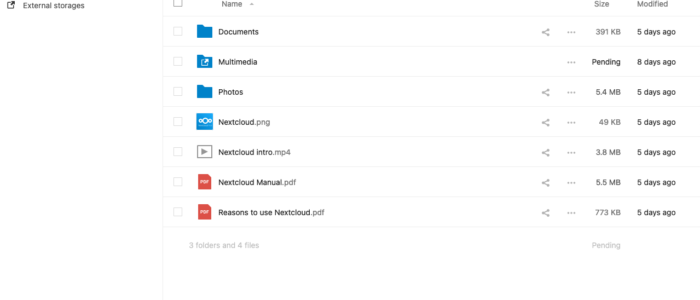
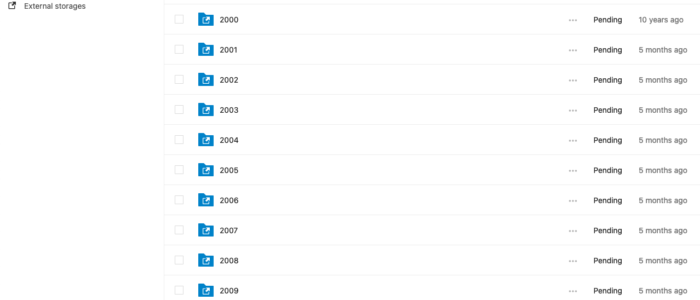
    If you now switch to “Files” you will see a reference to the external storage:

    Congratulation, you are now able to access the external storage using NextCloud! You can now download the NextCloud App on you mobile devices and use it.

    In part two of this tutorial we will secure the NextCloud jail using https with let’s encrypt and allow access from outside the local network.

    Any kind of feedback is highly appreciated.