In this blog entry I will describe how to configure the U5G Max on a different WAN-Port than the default one, considering advanced feature like port forwarding.
I am using the following setup:
- One UDR7 as my home router.
- One U5G-Max Outdoor, with inserted sim card.
- I want to use Port 1 on my UDR7 for the U5G-Max because this port supports PoE.
- The U5G-Max Outdoor is already connected to Port 1 but not adopted.
- I have local access to the cloud gateway.
Changing the default WAN interface to Port 1
In the first step we need to change the default port for WAN1 to Port 1 of the UDR7 (this is also the most important step):
- Go to “Settings” -> “Internet”, you will see the following settings:
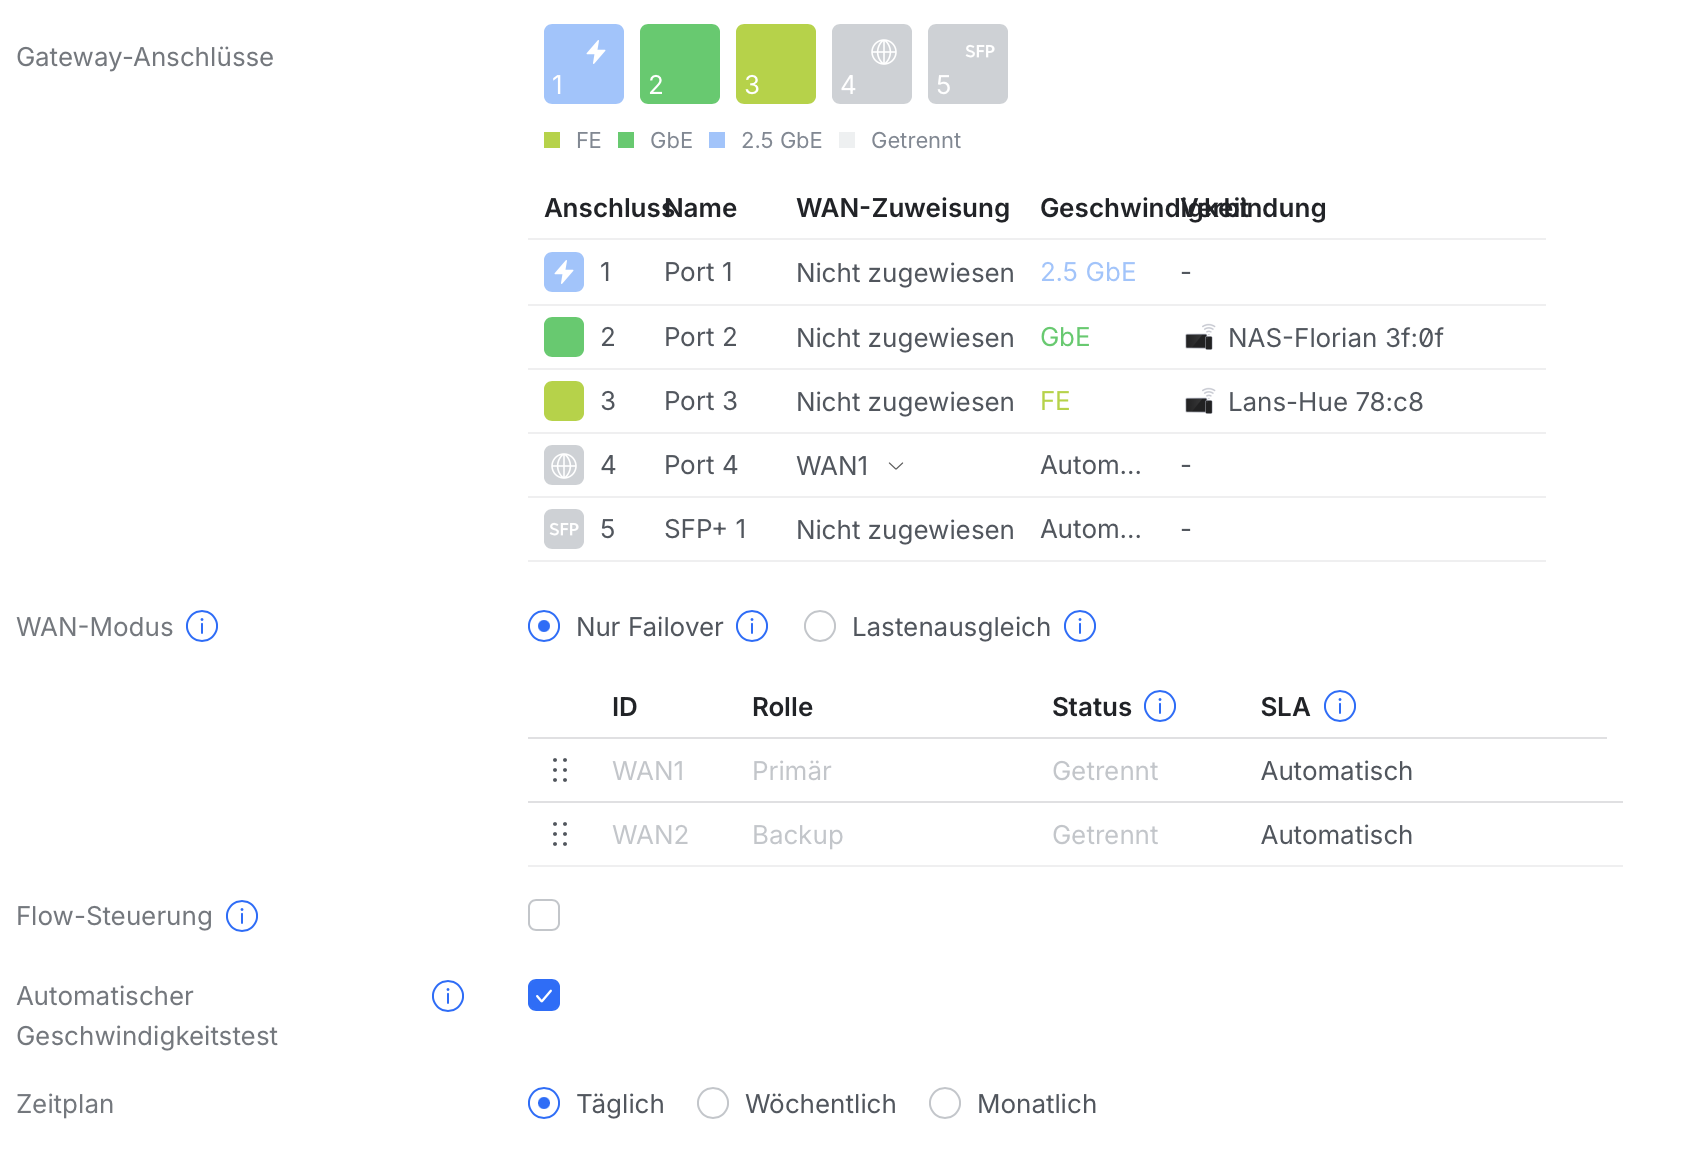
- Assign “Port 1” to “WAN1” and change “Port 4”, which is the default port for WAN to “Unassigned”:
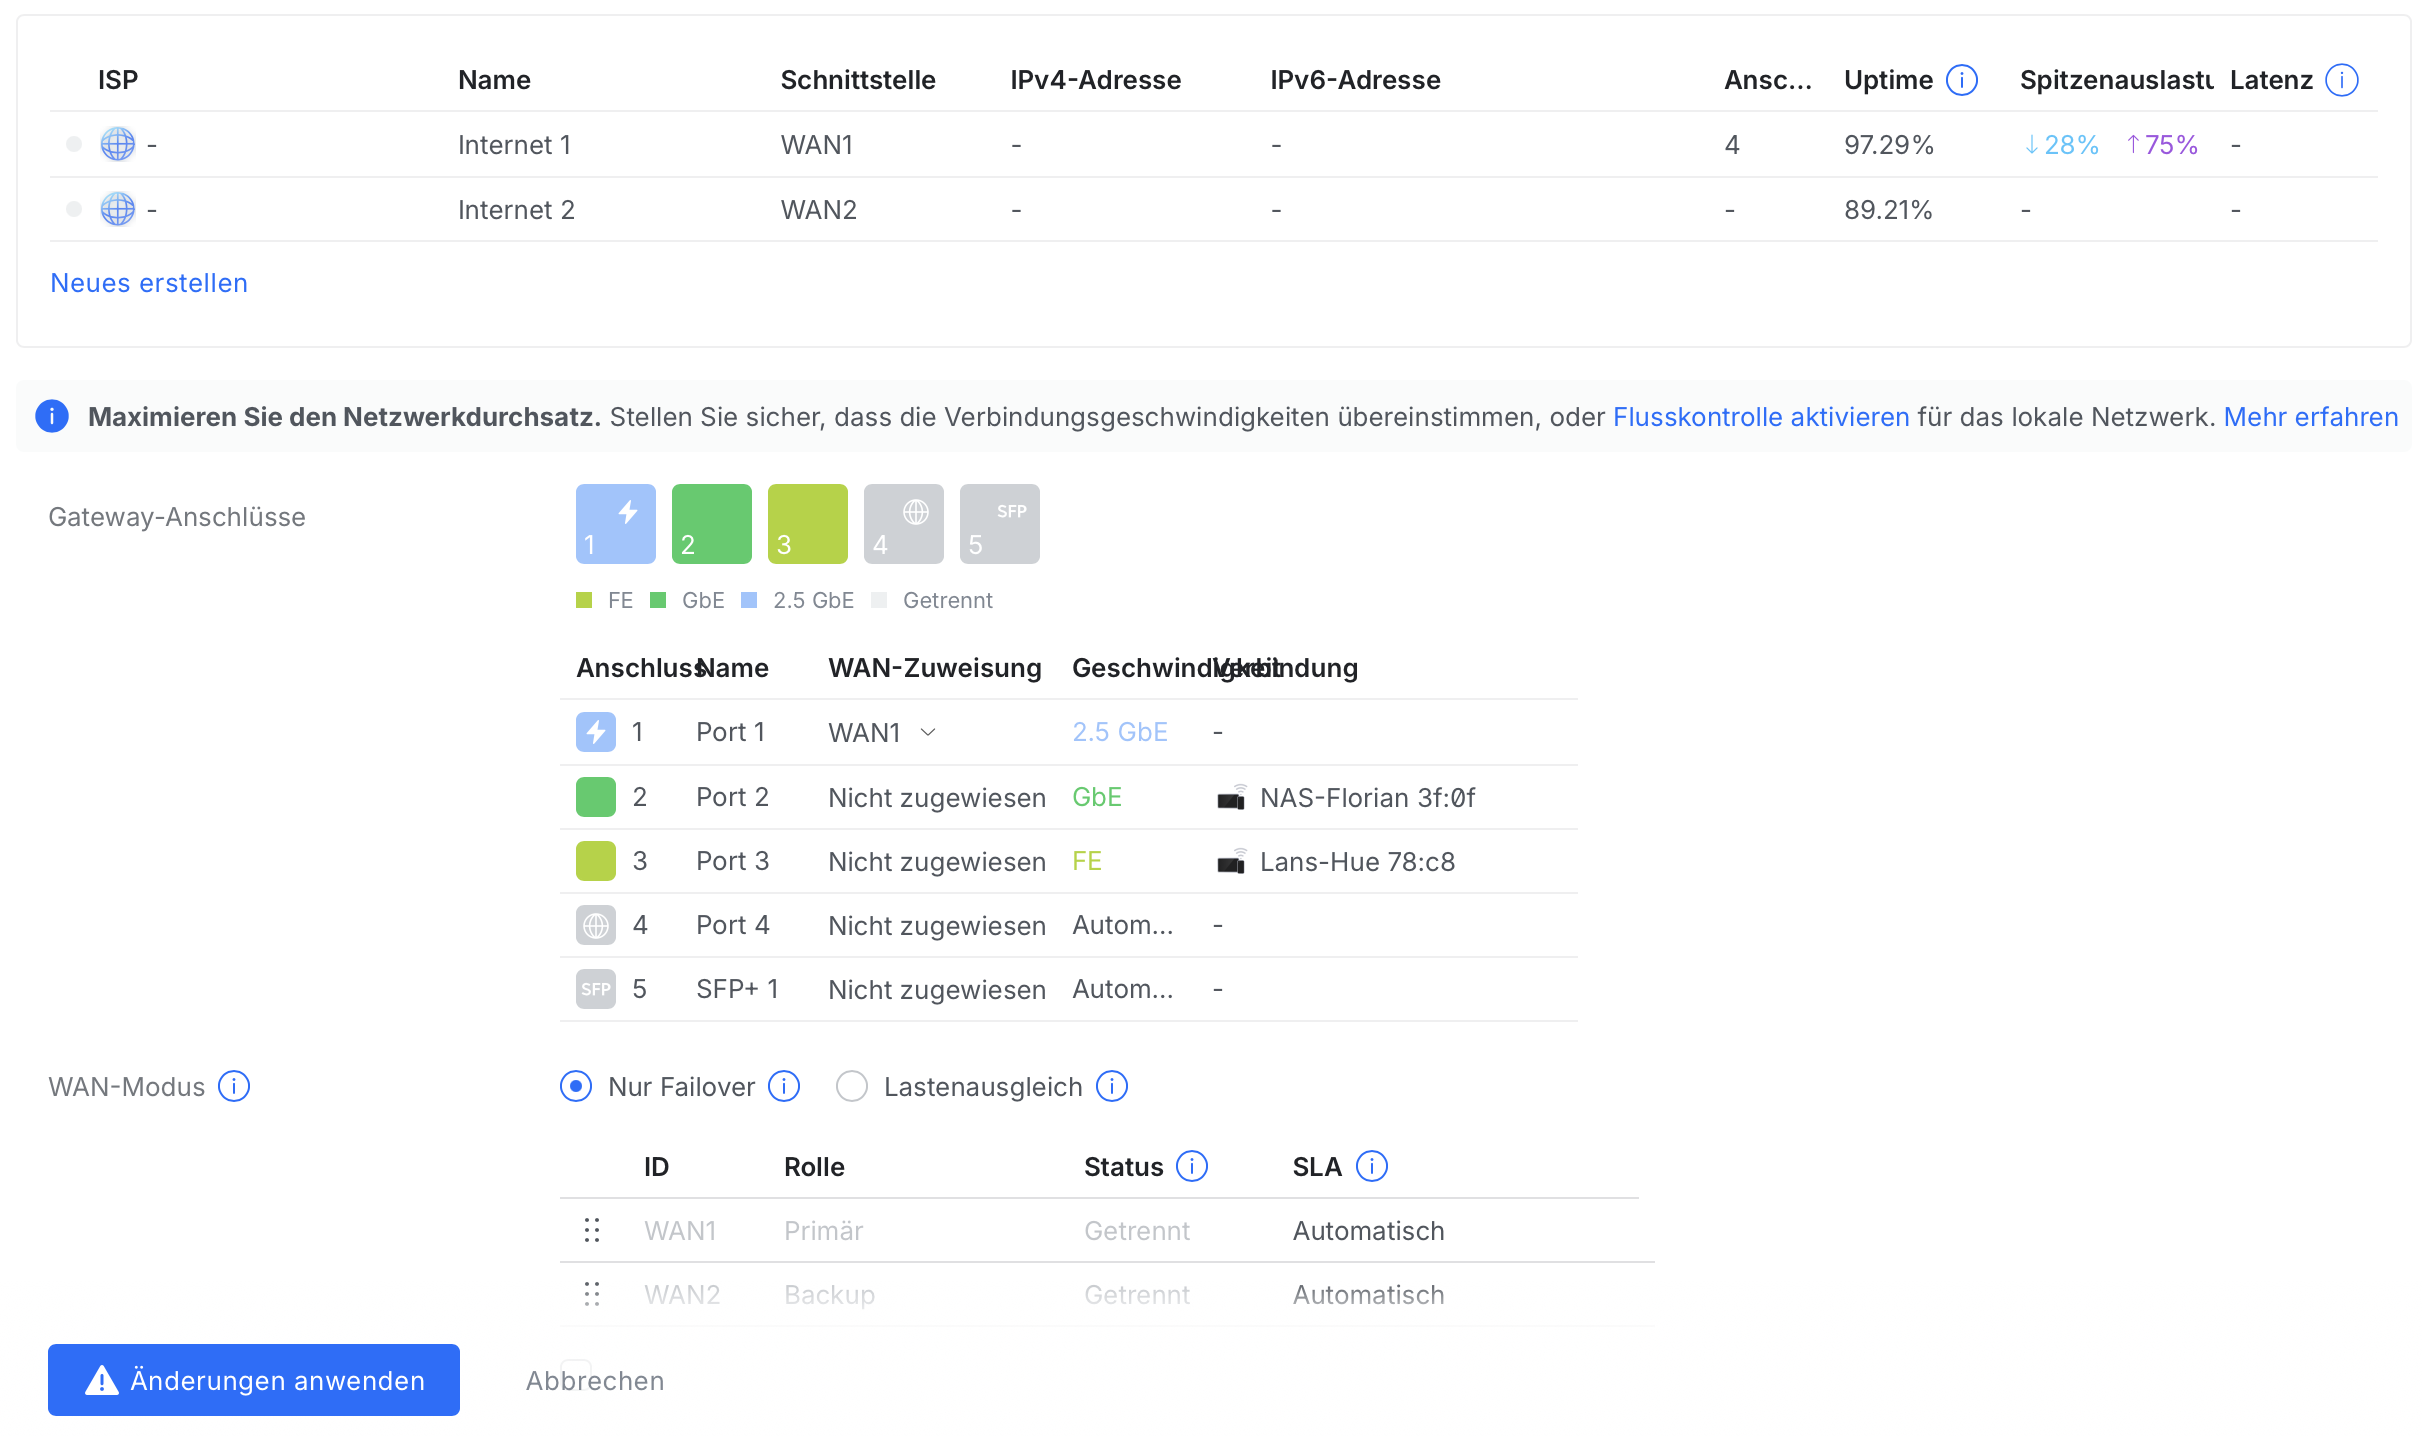
- Press “Apply changes” to store the changes.
In the next step we will adopt the U5G-Max.
Adopt the U5G-Max
To adopt the U5G-Max we go to “UniFi-Devices” and press “Click to Adopt” on the U5G-Max which should be shown:

After a certain time the small dot in front of the device switches to green and now we can check if the port forwarding rules are configured correctly.
Checking the port forwarding rules
- We go to “Settings” and select the small icon to display the “Policy Table”.
- Next we select “Port Forwarding” as Policy Type and select the policy rule.
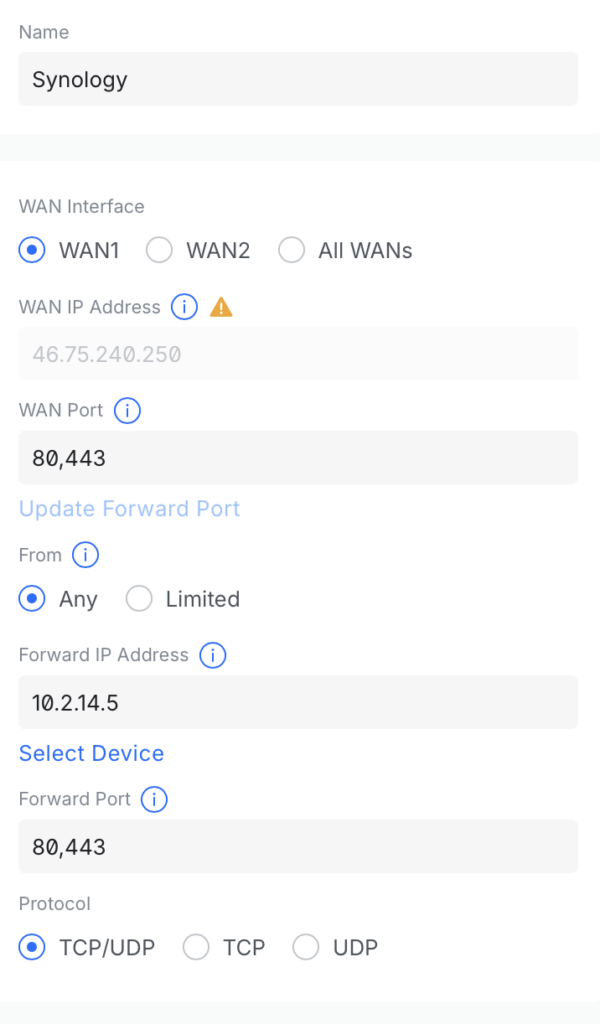
- The configuration will open, and there we need to check if the right WAN Interface is selected.
- In our case this must be WAN1.
- Finally we can check if the right ports are selcted and press “Apply” if we made any changes.
Now the port forwarding from the Internet using the U5G-Max should work.
Optional: Change the APN settings to static IP (A1):
Finally I will change the APN settings to a static IP-Address. This step refers to any customers of the Austrian provider A1 Telekom Austria like me, if you have a business tarif for your 5G Internet and therefore a static IP-address.
- We go again to “UniFi Devices” and select the “U5G-Max”.
- We go to “Settings” and scroll down until we can select “Use custom APN”.
- Then we change the “APN Address” to fixip.a1.net
- As “Authentication Type” we select “NONE”. All other settings remain as default.
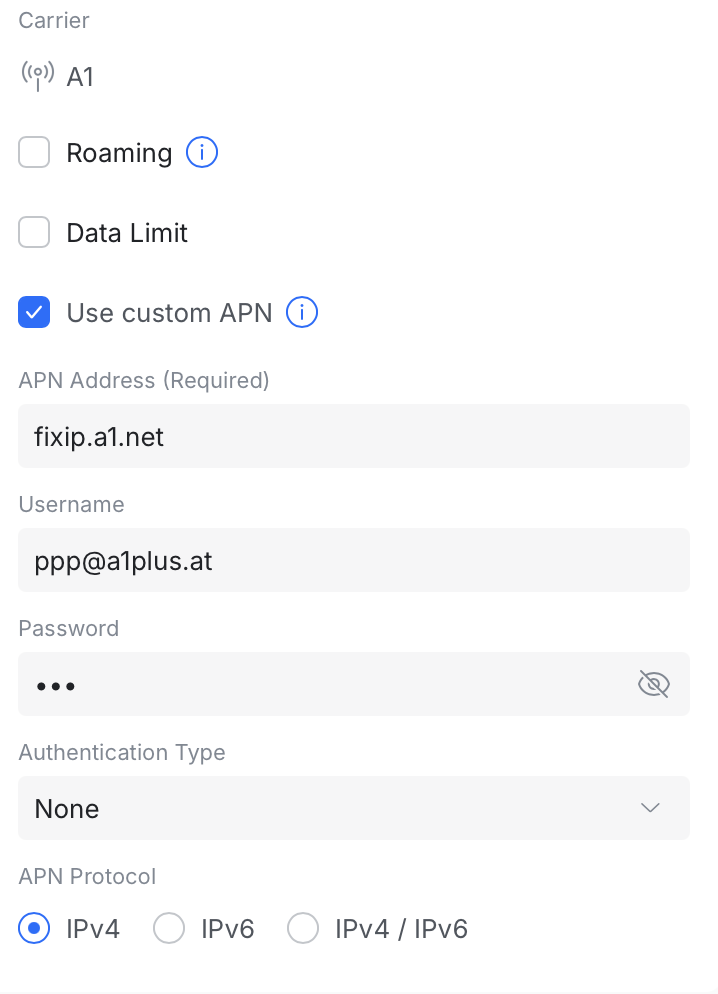
- With “Apply Changes” we submit the changes and after a short time the small dot in front of the devices switches again from orange to green.
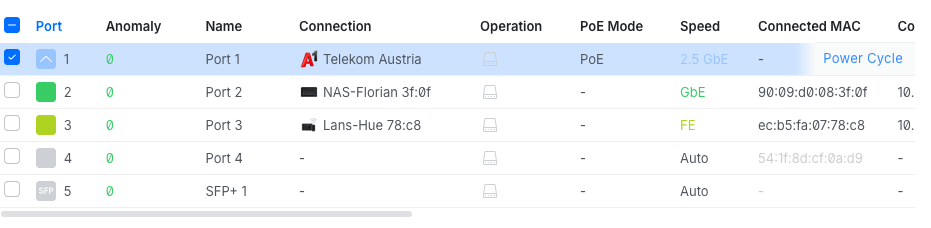
- As last step we need to restart the U5G-Max that the fix IP-address is applied. We switch to “Ports”, select “Port 1” and than we press “Power Cycle” which disables for a short time the power supply of the network port. Afterwards the U5G will restart and apply the fix IP-address.
I hope this step by step guide is helpful and feel free to comment.
