After the change to winter time there were several burglaries in my area, therefore I decided, it is time to install a video surveillance.
This blog will lead you through my process and its integration into my ecosystem at home. It’s more a detailed plan how to realize it and not a step by step guide how to e.g integrate the camera feed into Homekit.
About the place:
I am living very close to the forrest with a small garden which cannot be seen very good from the other apparamtents. Because the garden and my terrace is long but narrow and can only be accessed when walking a narrow path.
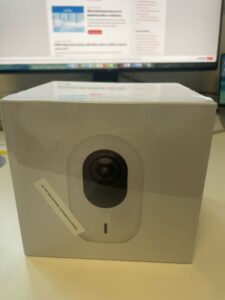
For monitoring my garden I decided to use the Ubiquiti G4 Instance . Even the camera is very small and also cheap, it is a very good camera, with a good night view and AI regognization of persons, animals and movements. The camera connects via WiFi with my system an is powered using USB-C.
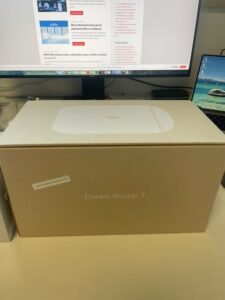
I do not want to waste space in my apartment with a lot of IT-stuff, for this I have my company. Therefore my whole IT/Network equipment at home consists of a Synology NAS, a UniFi Dream Machine for network and WLAN and a Hue Bridge for some of my lights in the apartment. All this equipment is located in a small shelve which does not need a lot of space. Therefore I want a single machine which provides Internet access, WiFI and as additional feature a recorder for my camera feed and should be accessible on my smartphone from everywhere. Until today this task is fulfilled by the Dream Machine (UDM). Unfortunatley the Dream Maschine does not support cameras, therefore I replaced it by the successor the Dream Router 7. This device looks like a white hat and supports Internet Access, WLAN and the different UniFi Apps like Network, Protect and Access. It has a slot to expand the internal storage. As additional feature this device has one PoE port which is very nice to use it, as power for my Hue bridge which does not support PoE natively, but there are a lot of adapters available. After making a backup of my UDM I switched it off and replace it by the Dream Router. After importing the backup I additionally installed Unifi Protect and plugged in my G4. The camera is immediately detected by the protect app and few minutes later the whole system is online and everything is ready. It’s really as simple as this!
With these two components I will do the following security deployment:
- The camera will be mounted on the terrace at a position where it is nearly impossible to destroy it before the person can be recognized.
- The Dream Router 7 will record the camera feed for a specifique time.
- AI recognization is enabled and will detect a person if he/she enters the garden.
- Unifi Protect is connected using Homebridge (which is installed on my Synology NAS) with Apple Homekit. See this video which explains how easy it is.
- Now I directly integrate the camera feed into the dashboard of Apple Homekit.
- Apple Homekit is already configured to notice if someone is at home.
- Next I switch into the settings of my home and select camera & doors.
- Inside I select the camera on the terrace an enable notifications with the following settings:
- Time: Any
- Persons: If no-one is at home
- A certain movements is detected
- A person is detected
- Enable snapshots in the notification.
Now I will get a notification with a snapshot if a person enters the garden & terrace and no-one is at home.
With using automations you can configure additional actions for different situations which can be helpful to secure your home.
This is my basic security setup which works quite well.
