In part one of this tutorial we installed TrueNAS and created a NextCloud jail which makes the NAS content available using a web browser or the NextCloud app locally. In part two we will secure our NextCloud instance using https and make it reachable from the Internet.
To do this we need the following requirements:
- A domain name which can be resolved from the Internet: Select oder register a domain name and make a DNS record pointing to the public IP-Address of your internet connection. I you have a dynamic IP-Address, you can use Dynamic DNS providers like NoIP to register a domain name.
- NAT and/or Port Forwarding for 80 and 443 on your Firewall and/or Router to the NextCloud IP-address: Configure your firewall for NAT or Port Forwarding that your TrueNAS server is reachable from outside using port 80 and 443.
Because there is a huge variety of devices I cannot not go into detail. If you are unsure check the documentation of your Modem/Router/Firewall for NAT and Port Forwarding.
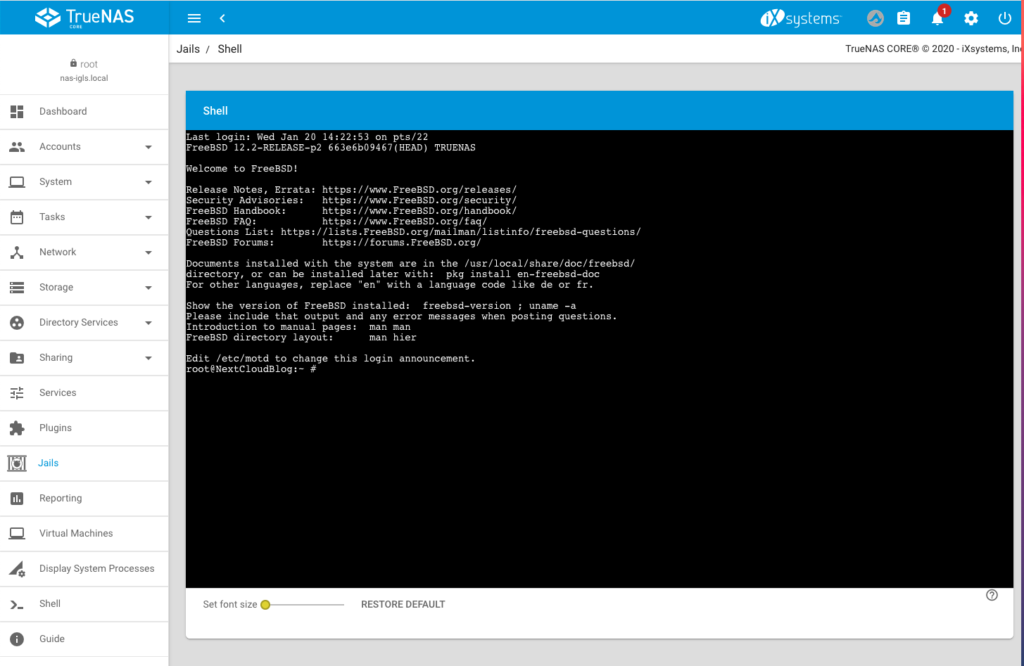
After we have prepared the requirements we will start securing our NextCloud instance with Let’s Encrypt. To do this, login to the backend of your TrueNAs server select the NextCloud jail and enter the command line:
Step 1 – Add the server name to the nginx config
We need to set the server name that certbot can verify it. To do this enter the following command to switch into the config folder of nginx:
cd /usr/local/etc/nginx/conf.d/
Use vim to open the config file:
vim nextcloud.conf
Replace the _ by the server name as displayed in the following screenshot:
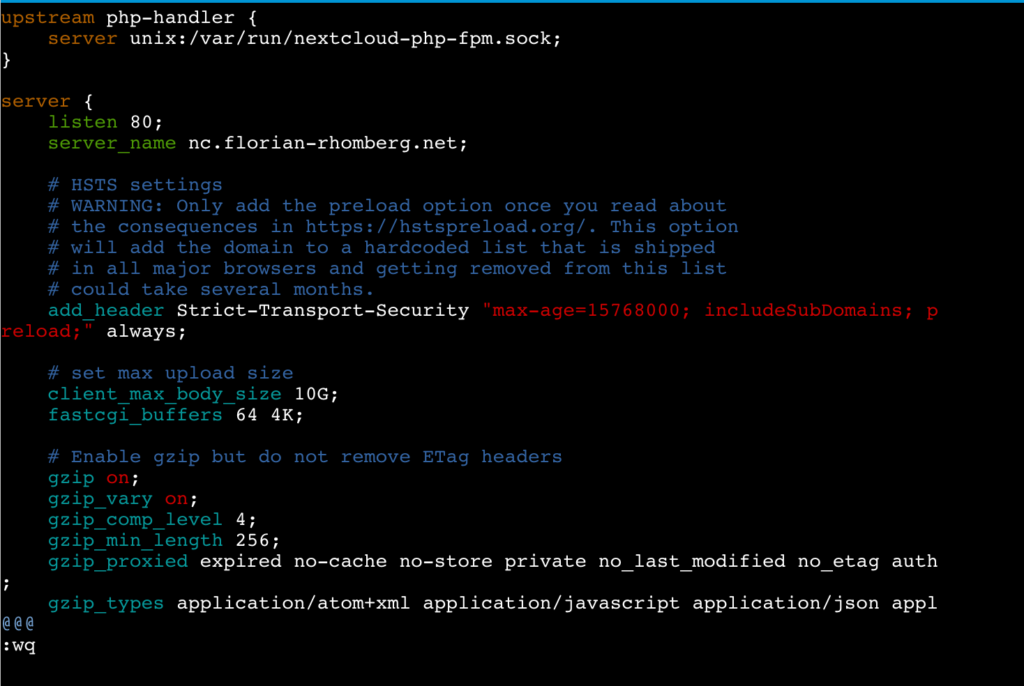
Save the changes and exit vim.
Step 2 – Installing Certbot
The following lines are more or less a copy of the real good tutorial from digitalocean.com describing How To Secure Nginx with Let’s Encrypt on FreeBSD. If have adjusted some commands (in the jail we do not need to use sudo) and skipped the part “Setting Up a Firewall and Allowing HTTPS Access” because we do not need to do this in the jail.
The certbot client is needed to obtain an SSL certificate. To do this we will use FreeBSD’s ports system. Enter the following commands in the command line of the jail:
Fetch a snapshot of the ports tree:
portsnap fetch
Extract the snapshot:
portsnap extract
Navigate to the py-certbot directory:
cd /usr/ports/security/py-certbot
Use the “make” command to download and compile the Certboot source:
make install clean
If you get the following error message (happened to me on TrueNas Core 13):
/!\ ERROR: /!\

Ports Collection support for your FreeBSD version has ended, and no ports are
guaranteed to build on this system. Please upgrade to a supported release.

No support will be provided if you silence this message by defining
ALLOW_UNSUPPORTED_SYSTEM.
you have to make the following command first:
setenv ALLOW_UNSUPPORTED_SYSTEM YES
The reason for this ist, that the jail of the Plugin uses an older version, which is no more supported by portsnap.
During this installation it is possible that some dialogs appear, you can safely confirm them.
Navigate to the py-certbot-nginx directory:
cd /usr/ports/security/py-certbot-nginx
There run the make command to install the certbot plugin for nginx:
make install clean
After a certain time the certbot Let’s Encrypt client is ready to use
Step 3 – Obtaining a SSL Certificate
Remember the requirements I have mentioned before. If they are fullfilled we can now obtain and validate a certificate by using the following command:
certbot --nginx -d nc.florian-rhomberg.net
Replace the domain nc.florian-rhomberg.net by your domain name.
Enter an E-Mail address and press enter:

Accept the terms of service by pressing y:

Accept or not that your E-Mail address will be shared with the EFF:

In the next stepped your are asked if HTTP should redirected to HTTPS, I would suggest to do this. I everything is working the SSL certificate is installed and you will get the following message:
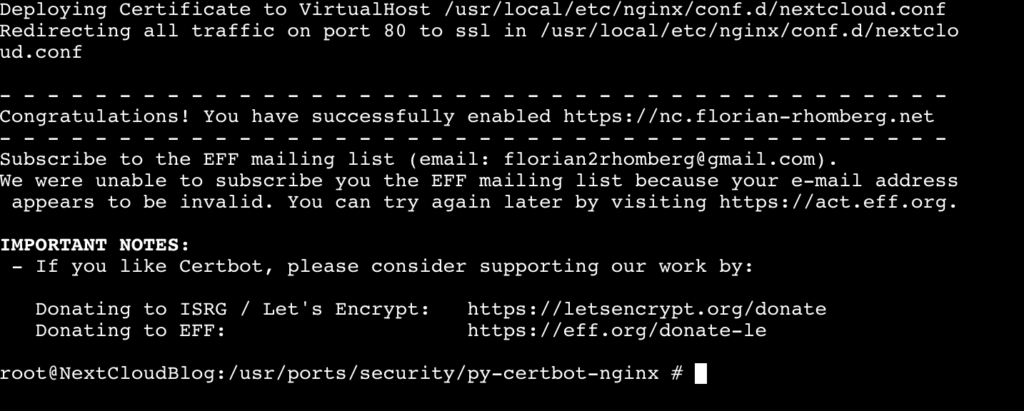
Congratulation your NextCloud instance is now available from the Internet using HTTPS.
Step 4 – Verifying Certbot Auto-Renewal
In the last step we ensure that the Auto-Renewal of the SSL certificate is working.
First make a simulation of the renewal process manually by using the following command:
certbot renew --dry-run
If this command succeed we can define a cron job for Auto-Renewal. For this enter the following command:
crontab -e
Now you can define the cron job for renewal:
0 0,12 * * * /usr/local/bin/certbot renew
This line will tell cron to run the certbot renew command twice every day. It checkss if there is any certificate on the system which is close to expire and will attempt to renew them when necessary.
Congratulation, now your NextCloud instance is reachable from the Internet and is using HTTPS per default.
Any kind of feedback is highly appreciated.

Hi,
Thank you for this how to do. I followed part 1 without problem. But in this one, impossible to use the „make“ command to download and compile the Certboot source. I get several errors :
Building new INDEX files… done.
root@nextcloud:/usr/local/etc/nginx/conf.d # cd /usr/ports/security/py-certbot
root@nextcloud:/usr/ports/security/py-certbot # make install clean
===> Building/installing dialog4ports as it is required for the config dialog
===> Cleaning for dialog4ports-0.1.6
/!\ ERROR: /!\
Ports Collection support for your FreeBSD version has ended, and no ports are
guaranteed to build on this system. Please upgrade to a supported release.
No support will be provided if you silence this message by defining
ALLOW_UNSUPPORTED_SYSTEM.
*** Error code 1
Stop.
make[3]: stopped in /usr/ports/ports-mgmt/dialog4ports
*** Error code 1
Stop.
make[2]: stopped in /usr/ports/ports-mgmt/dialog4ports
===> Options unchanged
/!\ ERROR: /!\
Ports Collection support for your FreeBSD version has ended, and no ports are
guaranteed to build on this system. Please upgrade to a supported release.
No support will be provided if you silence this message by defining
ALLOW_UNSUPPORTED_SYSTEM.
*** Error code 1
Stop.
make[1]: stopped in /usr/ports/security/py-certbot
*** Error code 1
Stop.
make: stopped in /usr/ports/security/py-certbot
root@nextcloud:/usr/ports/security/py-certbot #
Hi,
try the following command this should solve your problem:
make -DALLOW_UNSUPPORTED_SYSTEM install cleaninstead of
make install cleanThe reason for this error is, that Portsnap has been deprecated in upstream FreeBSD, for some time. I wanted to revise the entry, but I had no time last week.
Hope this helps,
Florian
Muchas gracias después de varios días intentadolo ha sido la única pagina que ha funcionado,
Use make -DALLOW_UNSUPPORTED_SYSTEM install clean, tarda unos cuantos minutos y salen algunos fallos que hay que ignorar, después de eso hay que irse a la raíz cd / y entrar al otro directorio y ejecutar de nuevo el comando anterior.
Yo lo hice en un Truenas con un plugin de nextcloud y ese plugin tiene en su interior un S.0 FreeBSD
This step-by-step guide is great! Thank you for putting it together. One question, what if I already have a valid SSL Certificate that I would like to use? How do get in working with Certbot or is there another way?
Thank you.
Hi, yes this is possible. If you are using certbot the client puts the ssl settings into (based on this tutorial) usr/local/etc/nginx/conf.d/nextcloud.con. At the end of this file you file find some settings according to ssl:
listen443 ssl;

ssl_certificate /path2/public/key.key

ssl_certificate_key /path2/private/key.key
Replace the path of the second and third line by your path to the public and private key of your certificate. I dod not test ist, but after restart of ngnix you should be fine.
For more details I refer to the official nginx documentation: https://nginx.org/en/docs/http/configuring_https_servers.html
Greetings,
Florian
I’m receiving a challenge failed type: unauthorized when I try to complete the ssl certification, my ports are forwarded and my dns is correctly pointing to the IP address. I’m not sure why I am receiving this error.
What is the exact error message? Is it possible that you have forgotten to allow http traffic to your NextCloud instance on port 80? For the ssl challenge the instance must be reachable through port 80!
Florian
Step 4 – Verifying Certbot Auto-Renewal
Is not working for my installation. Are you sure this is the only way?
What is your error message?
Florian
Thank you, Florian. The explanations are working fine.
I have a question though, each time I reboot the TrueNAS or the NextCloud, the file that we change at step 1, /usr/local/etc/nginx/conf.d/nextcloud.conf, lost the modification with server name.
Any idea why ? How to make the change persistent ?
found the solution here https://www.truenas.com/community/threads/ssl-change-after-nextcloud-reboot.95672/
Hi Florian,
thank you very much for your great instructions – they have worked perfectly up to this point. I have configured TrueNAS and NextCloud, have access to the NextCloud data on the local network, have configured DynDNS and Let’sEncrypt and can establish an https connection to my server from the internet – and then end up with the error message “No trusted domain”. Logical, actually.
I even tried entering ‘*.*.*.*’ as IP adress under trusted domains, without success. Actually, it would be a reasonable wish to be able to access one’s Nextcloud at home from any internet café around the world in an emergency…
Is there a solution, or am I thinking completely wrong?
Thank you,
Frank
Florain, thank you for these 2 postings.
Your documentation worked for me without and issue!
Mike
Hello Florian,
Thank you so much for this excellent guide.
I am having an issue adding the cron job for auto-renewal. When running crontab -e, the first line is listed as “@weekly renew certificates”, and it seems impossible to change. It could be that crontab in the shell is not working correctly, it seems unresponsive for the most part (once in a while it will let me add a few lines). Would it be possible to add the cron job under “Tasks” in the TrueNAS interface, or does it need to be done in the shell for that specific jail?
I had an issue when I restarted the server and it seemed unable to renew properly, and I pretty much had to go through all steps above to have the certificate in place again.
Thanks again for your excellent writing.
Hi
Thanks for the incredible tutorial – works beautifully.
I have the cert up and running. That said, not used to using the command face
Could you breal down the final step with a pic once I enter crontab -e using putty
Now you can define the cron job for renewal:
0 0,12 * * * /usr/local/bin/certbot renew
Also once i restart the jail nextcloud.conf doesnt keep any changes. Cert reverts back to trueNAS and external access gives warning site not secure/cert not valid.
Tried from scratch many times and cant resolve.
What am I doing wrong?
Hello! I was following this tutorial and I have run into a problem at the step where we run the command “certbot –nginx -d my.domain.net”
I get an error that says “The ‘josepy>=1.13.0 distribution was was not found and is required by certbot”
I feel like I’m missing a simple step here…
Hello,
have you already tried to figure out the name of this package and tried to install it using
pkg install name_of_package?Usually this should solve your problem.
Florian
Like it, thanks man! 1 manual which explain what is what.
Are you able to help some with? ‘ERR_TOO_MANY_REDIRECTS’
Nexcloud is working properly thru local ip with NOTsecure connection, and was working with not secure connection thru website www. After I install certbot, it stops and all I have is ‘ERR_TOO_MANY_REDIRECTS’
Hello
sorry, for the late reply, I think you have an error in your nginx configuration, please check
vim /usr/local/etc/nginx/conf.d/nextcloud.conf(if you have followed my turorial) and compare it with some working examples you can find if you search for nginx configarion and let’s encrypt.Florian
Thank you Florian for this excellent tutorial 🙂
I have a question that will probably interest everyone. When I update Nextcloud to a new version will I have to do the same thing again?
Thanks for your response Richard.
Hi,
sorry fo the really late reply, the last month was very busy. If you update the jail, you do not need to make the same steps again. You can even use the integrated update tool of nextcloud to get always the new version.
Hope this helps,
Florian
Hello Florian and thank you for this tutorial. In my case I succeed up to a certain point. When I try to get an SSL certificate, it issues me this error: (I premise that nextcloud works on port 8283)
Certbot failed to authenticate some domains (authenticator: nginx). The Certificate Autority reported this problems:
Domain: xxxxxxxxxxxx.ddns.net
Type: unauthorized
Detail: xxx.xxx.xxx.xxx: Invalid response from http://xxxxxxxxxxxx.ddns.net/.well-know/acme-challenge/series of letters and numbers: 404
Hint: The Certificate Authority failed to verify the temporary nginx configuration changes made by Certbot. Ensure the listed domains point to this nginx server and that it is accessible from internet.
Can you help me? I understood that the path is not being found because port 8283 is missing at the link it refers to.
Hi,
as far as I know, your nextcloud instance must be reachable from the internet on port 80 and 443 that the certbot challenge works. Therefore you need to run nginx on port 80 and 443 or (not suggested!) use a Port translation on your router to map the external Port 80 to 8283 and Port 443 to the ssl port configured in nginx.
Florian
Thank you for your kind response
hi I am using your guide to setup certbot on a piwigo server.
i figured it out and installed the cert and it works but i can’t get the redirection for traffic on port 80 to port 443.
it did not ask me if i wanted to do that when i was getting a cert.
Are you using nginx or apache?
Greetings,
Florian
I am very happy thank you very much this is the best tutorial for https access on nextcloud
it’s short and clear
Hi Florian,
after cd /usr/ports/security/py-certbot, I write make install clean, and I have this error:
===> py39-certbot-2.3.0,1 depends on package: py39-acme>=2.3.0,1 – not found===> Installing for py39-acme-2.3.0,1
===> Checking if py39-acme is already installed
===> An older version of py39-acme is already installed (py39-acme-2.2.0,1)
You may wish to “make deinstall” and install this port again
by “make reinstall” to upgrade it properly.
If you really wish to overwrite the old port of py39-acme
without deleting it first, set the variable “FORCE_PKG_REGISTER”
in your environment or the “make install” command line.
*** Error code 1
Stop.
make[2]: stopped in /usr/ports/security/py-acme
*** Error code 1
Stop.
What can I do now? Thanks
Hi,
try to follow the guide of the message:
make reinstall py-certbotFlorian
Hi,
I have been trying to get this setup for a year, intermittenly, and I have failed utterly.
At first, I was able to access my nextcloud through a duckdns link if I just installed the nextcloud plugin “without altering the install parameters”, but I had the certificiate issue.
I have followed this tutorial to a t and redid everything. Now I cannot use my dns link “myname.duckdns.org” to access my nextcloud. What am I missing? All attempts just say “Err_Connection_timed_out”.
I have portforwared 80 and 443 to my nextcloud local ip,.
Thanks for the great tutorial.
Now that I moved from Truenas core to Truenas scale,
I wonder if this can be done in Truenas scale?
Thanks again
Unfortunately, till today I had no chance to install Nextcloud on TrueNAS Scale. However, as far as I know on TrueNAS Scale the right way to achieve this is to use a container.