Last summer I decided to replace my QNAP NAS by a more comprehensive NAS. I am working a lot with Dell servers, and therefore it was an easy decision for me to use a Dell PowerEdge R340 with currently two 10 TB Seagate Iron Wolf hard discs, and two 16GB microSDHC/SDXC Cards as replacement. I know using such a server as a private NAS might be exaggerated, for some, but I wanted a rack device and more important enough server resources for experimental reasons. As operating system I decided to use TrueNAS Core, formerly FreeNAS.
I configured the PERC Raid Controller in HBA mode using iDRAC, because TrueNas is using ZFS which has an integrated RAID functionality. In fact, using a Hardware RAID with TrueNAS is definitely not suggested! The two screenshots below show, how to switch to HBA mode using iDRAC:


I installed TrueNAS on one of the two 16GB microSDHC/SDXC Cards. The two 10TB Seagate discs should exclusively be used as storage devices and not partly for the operating system. The second 16GB microSDHC/SDXC Card will later be used to mirror the operating system.
I performed the installation using the web interface of iDRAC, which is really a comfortable way to do it. iDRAC is an independent administration tool, shipped with all Dell servers and works immediately after the server is plugged in to the power supply. From iDRAC you can control and administrate the complete server. There is also a remote console feature.
There are a lot of tutorials available in the web how to install TrueNAS therefore I do not want to go into detail and refer to them.
After installing TrueNAS Core, creating one or more pools and sharing we have a working NAS which we can access, using SMB, AFP etc. Again, I do not want to go into detail and reference to the TrueNAS documentation because scope of this blog is how to create a private cloud using NextCloud and how to access it from anywhere in the world.
Installing NextCloud
Now let us start with the installation of NextCloud. TrueNAS provides a certain number of plugins to extends the functionality of the NAS. Each plugin will be installed in his own jail and is therefore independently. Wikipedia defines a jail as a “OS-level virtualization that allows system administrators to partition a FreeBSD-derived computer system into several independent mini-systems called jails, all sharing the same kernel, with very little overhead”. Simply spoken, it’s a FreeBSD container virtualization like Docker. Some plugins are officially maintainanced by iXsystems and there are also a certain number of community plugins available.
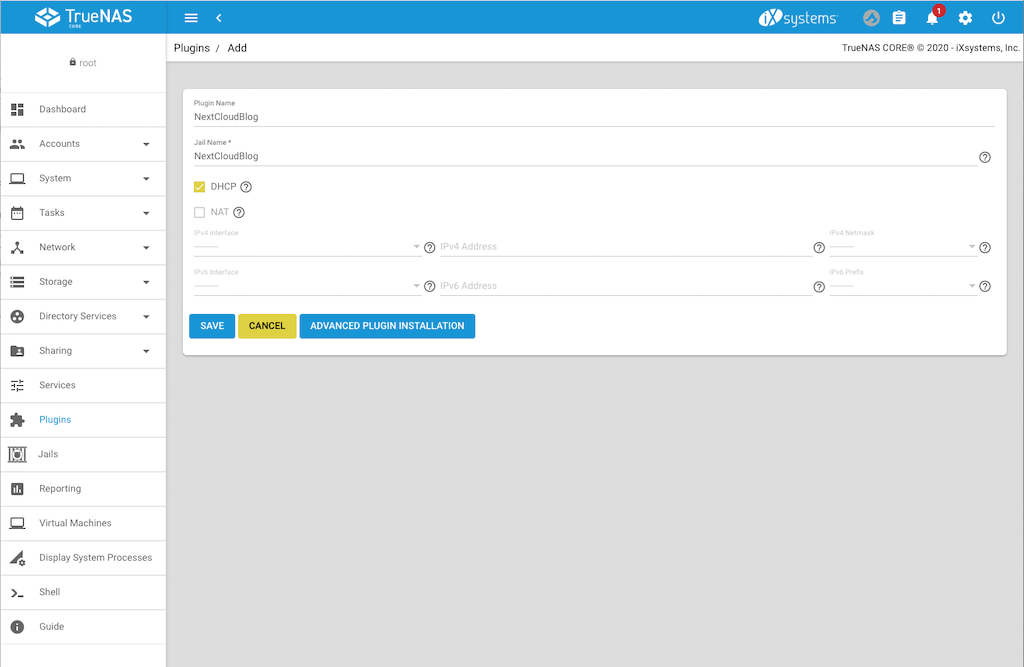
NextCloud is an official plugin, therefore we simply goes to Plugin int the TrueNAS backend and select NextCloud. At the time when this entry was written the plugin is using NextCloud 20.0.4, instead of 20.0.5. However this is nearly the current version and shows me, that the plugin is actively maintenanced by iXsystem. Select the plugin and press install. A form is opened where you can define the settings. Enter the plugin name and jail name you want. Disable NAT, we will give this jail its own IP-Address. Select the interface on which the NAS ic connected, enter the IP-Addres you want that next cloud is listening and the netmask. Alternatively press DHCP if you want to manage the IP-Address in your router, as I mostly do. The following screenshot shows the settings:
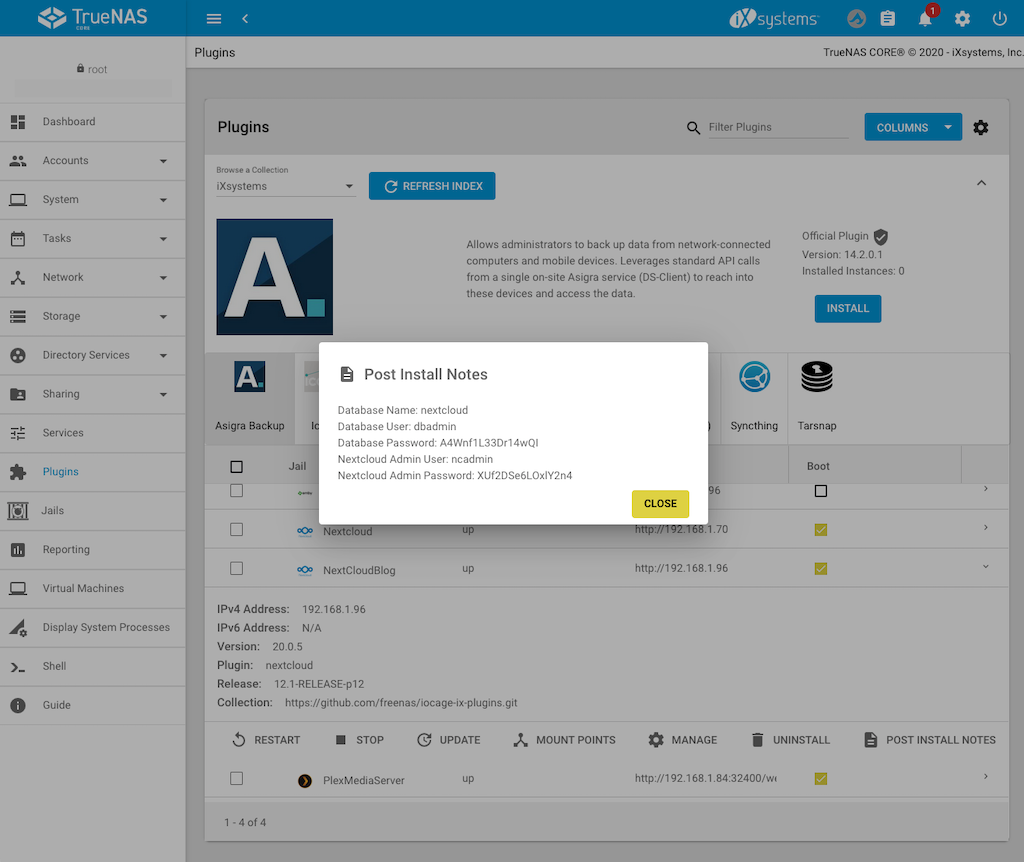
Press save and installation dialog is displayed and wait until it is finished. Press “Close” to close the dialog which informs you about the successfully installation. Next press “Post Install Notes” to display the username and password for the admin access to NextCloud and copy it or write it down:
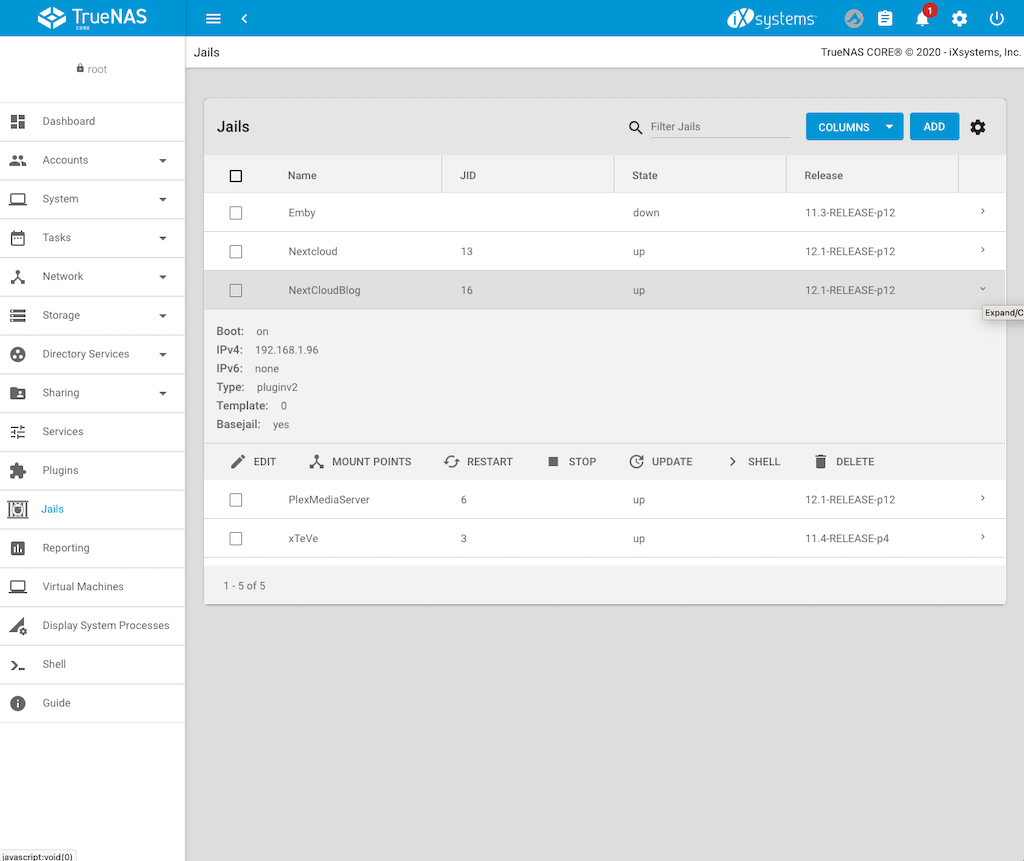
Now switch to Jails to get the IP-Address of your NextCloud jail and to create mount points:
Creating the mount points for the jail
Before we access our NextCloud instance for the first time, we will mount the NAS directories which should be accessible from the jail and therefore from NextCloud. To do this:
- Stop the jail
- After the jail has stopped press “Mount Points”
- Press on “Actions” and select “Add”
- On the top, select the directory which should be accessable from the jail (in my case /mnt/Data/Multimedia)
- Below select the mounting point in the jail (in my case: /mnt/Data/iocage/jails/NextCloudBlog/root/mnt/Multimedia). You do not have to create the folder in the jail first, you can directly enter the path (the folder Multimedia does not exist in the jail, but it will now be created).
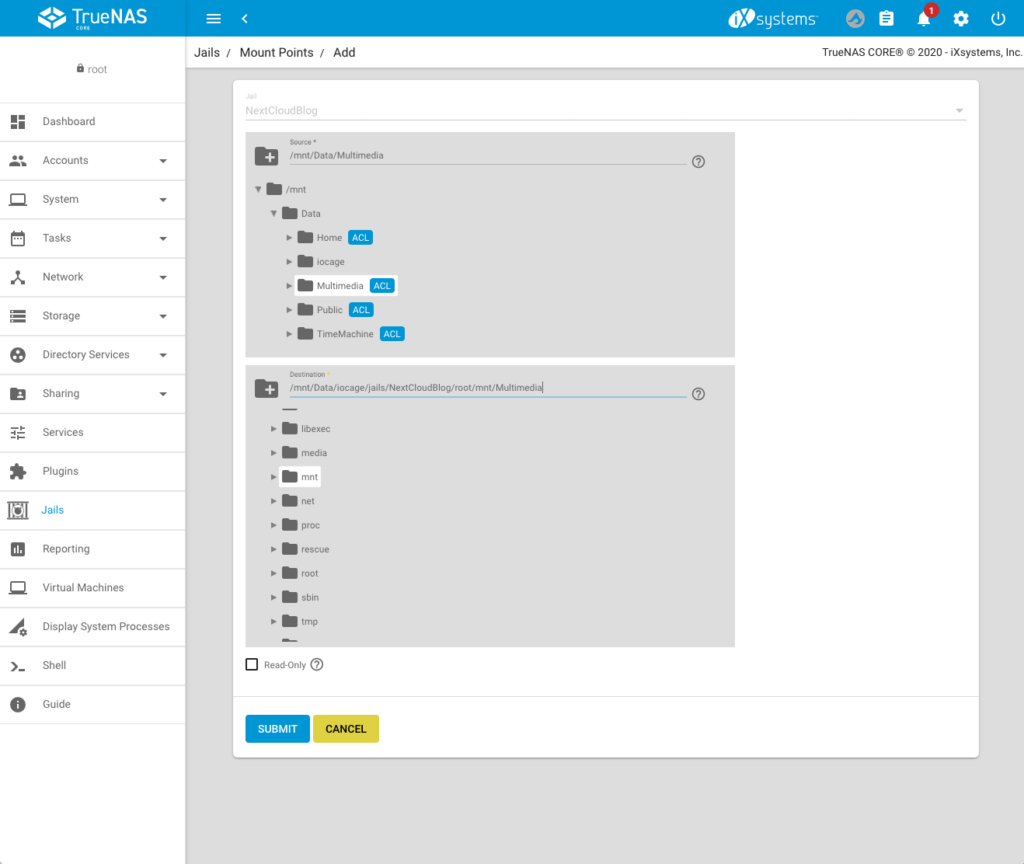
6. Press “Submit”. You can add additional Mount Points if you want.
7. Go back to jails and start the jail.
Add the local network to the trusted domains of NextCloud
Unfortunately before we can use the NextCloud webinterface we need to add the local network to the trusted domains. To do this:
- Select the NextCloud jail and press the “Shell button”
- Install the vim editor to directly edit the config.php file by using the following command:
pkg install vim-console
- Go to the config file by the entering the following command:
cd /usr/local/www/nextcloud/config - Open config.php file to edit:
vim config.php - Press i to insert and edit the lines
- Add the whole home network by adding the following line to the trusted domains:
2 => '192.168.1.*'
or whatever your home network IP-Address is.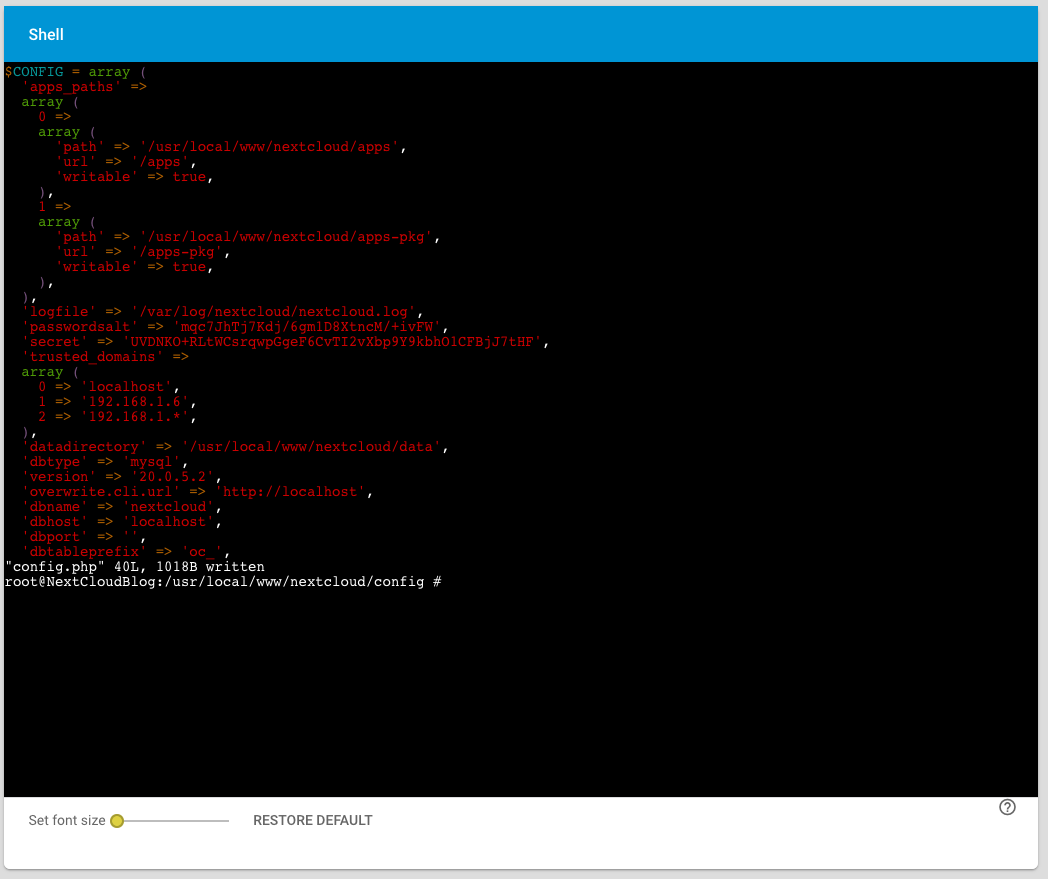
- Press Esc and then enter :wq to store the file and exit vim.
Accessing NextCloud for the first time
No we can login to NextCloud for the first time by entering the IP-Address of the Jail:

I would suggest to change the password of ncadmin or simply create a new admin user. In the next step we will add the Multimedia mounting point to NextCloud.
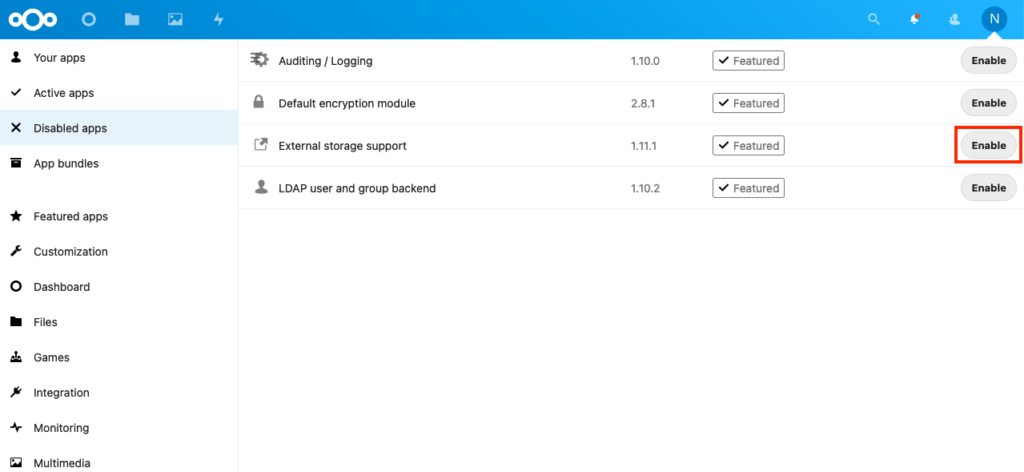
Enable External storage to add a local directory to NextCloud
In the NextCloud backend we switch to apps and then to “Disabled apps”. There we find the “External Storage support” app and enable it:
In the next step we switch to settings and select “External Storages”
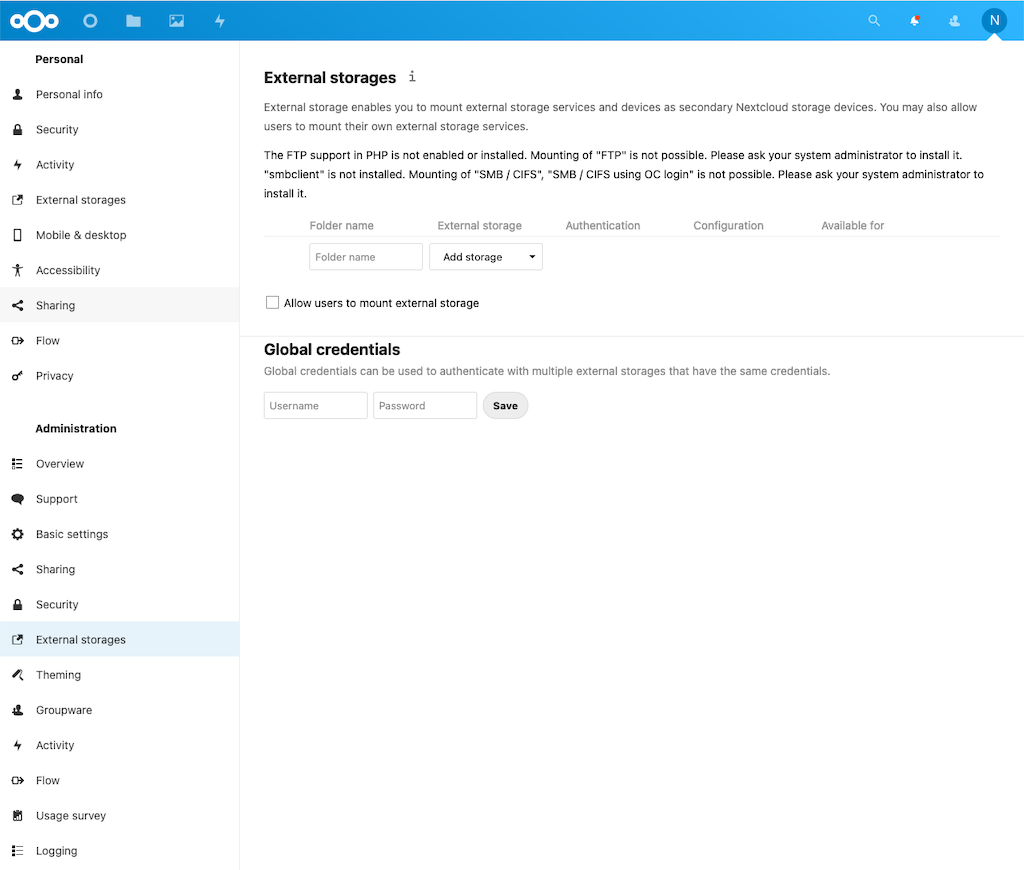
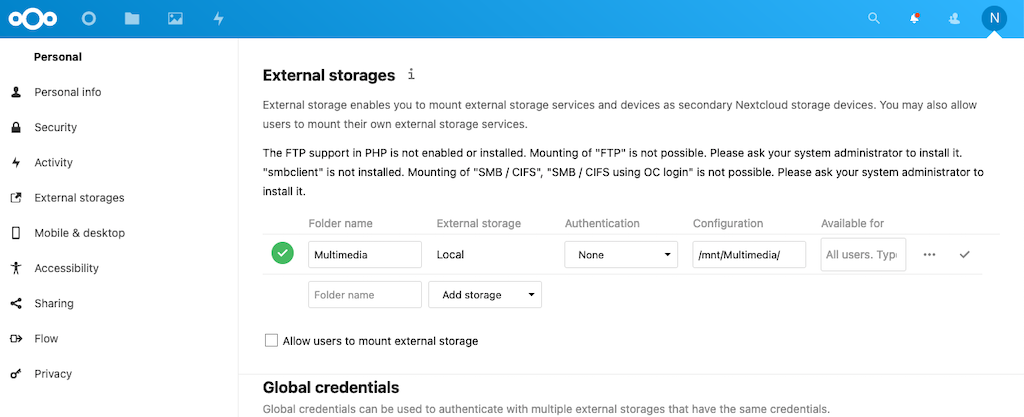
Now we can enter the “Folder Name”, the type of “External storage” (Local), the “Authentication”, the “Configuration” (meaning mounting point, or location) and who is allowed to access our external storages (“Available for”). Final press the Checkmark to check and store the configuration. Based on this tutorial the external storage configuration looks the following way, the green checkmark confirms that the external storage is accessable:
If you now switch to “Files” you will see a reference to the external storage:


Congratulation, you are now able to access the external storage using NextCloud! You can now download the NextCloud App on you mobile devices and use it.
In part two of this tutorial we will secure the NextCloud jail using https with let’s encrypt and allow access from outside the local network.
Any kind of feedback is highly appreciated.

Florian, thanks for these guides. I am researching homeserver components and have it in mind to use a TrueNAS – NextCloud setup as well, so this will be very helpful. Will report back how it goes.
This was the most straightforward and clearest explanation of how to do this I can find. Thank you. There keeps being missing information in other guides.
I was looking for information on how to use TrueNAS and NextCloud. Thank you for the article.
unfortunately this didn’t work for me because my truenas shared folders have different permissions than nextcloud, and I couldn’t figure out what uid/gid to add the the mount point acl to give it access.
Hi,
usually if the TrueNAS root user has access to your shared folders there should be nor mounting problems within the jail.
Otherwise check under which user the jail is running. To do this, login to TrueNAS Web-UI, select “Jails”, select the NextCloud jail and click “Edit”, select Jail Properties and you can see the user under which the jail is running, you can also change it here to a user which has read/write access to your shared folders.
A different approach, I have not done it currently is to configure NFS in the jail and mount the shared folders using nfs. In this case you can select under which user the shared folders should be mount. However, this is not really the straightforward way.
Florian
Hey Florian,
I had same error as ticktock, and tried what you said. The ACL of dataset that I wanted to be source for the mount had it configured to a user and group other than group. So i assumed root had no access so I added new ACL item with root user having full control, however it still fails to mount. I don’t know what to do proceed forward so your response will be much appreciated. Thanks
Have a great day
HI Florian, are you putting the full address path for your multimedia mount or just /mn/multimedia/? The steps I’ve followed from youtube are the same as your tutorial, but I keep getting a Red Exclamation mark with no error message. The only thing, is at the top, I have ” “smbclient” is not installed. Mounting of “SMB/CIFS”, “SMB/CIFS using OC login” is not possible. Please ask your system administrator to install it.”, but then again, your screenshot says that also. I’m using Truenas 12. I haven’t done anything with datasets, users or edited the ACL in truenas however since setting up TrueNas only yesterday. My mount path is /mnt/TrueNAS_Server/iocage/jails/NextCloud/root/usr/local/www/nextcloud/nextclouddata/usr/local/www/nextcloud/nextclouddata
Can you please assist with with steps I need to take? I can access my TrueNAS storage from my local network. Just cant get past the Red Exclamation mark with Next Cloud.
Thank you,
AJ
Under Jail Properties, I think It’s running under the Root user from what I can tell. Complete Newbie to both TrueNas and NextCloud since yesterday….thanks again
Also, Next Cloud is DHCP, and Truenas Static Ip if that could possibly have something to do with it?
Hello,
I’m using TrueNAS CORE version 12.08-U8 and I can’t get the vim editor to install.
The output when I use the command [pkg install vim-console] is as follows…
Updating iocage-plugins repository catalogue…
iocage-plugins repository is up to date.
All repositories are up to date.
pkg.: No packages available to install matching ‘vim-console’ have been found in the repositories.
Any help would be appreciated as I’m using this guide (https://www.florian-rhomberg.net/2021/02/securing-nextcloud-jail-using-https-and-lets-encrypt-part-two/) which requires vim…
Try typing:
pkg install vim
Cheers for the information, great guide! Just a note you can use vi instead of vim it doesnt seem to find the vim console unless its called vi-console but it was already there
Try don’t typing “-console”, it should work:
pkg install vim
Thank you, Florian. This guide solved my problem with the nextcloud config.
Happy to hear -:)
Florian
i have this error:
The FTP support in PHP is not enabled or installed. Mounting of “FTP” is not possible. Please ask your system administrator to install it.
“smbclient” is not installed. Mounting of “SMB/CIFS”, “SMB/CIFS using OC login” is not possible. Please ask your system administrator to install it.
idk what to do. im searching but no results.
So, i fixed it.
If anyone has this issue this is how to fix this:
If your path is like this /mnt/yra/iocage/jails/nextcloud/root/usr/local/www/nextcloud/
just add another folder like this /mnt/yra/iocage/jails/nextcloud/root/usr/local/www/nextcloud/files